AWS EC2 Tutorial
In this article, we will discuss about AWS EC2 service, its advantages and how to spin up an EC2 instance along with the actions we can perform in it.
Below are the topics we will discuss in this article:
What is AWS EC2?
Elastic Compute Cloud provides a highly scalable virtual compute environments in the AWS cloud. Each virtual environments are called Instances. You can configure the Operating system, CPU, security and memory and create a virtual server in minutes whenever needed.
You can also create EC2 instances on different physical locations based on customer demography.
Thus it saves a lot of planning, effort and money to create and maintain physical systems for your organization. Amazon takes care of them for you. You are just responsible for creating and securing EC2 instances for your application requirements.
Demo on AWS EC2
Let’s quickly jump to a small demo on how to spin up and access an EC2 instance.
Configuring a new EC2 instance
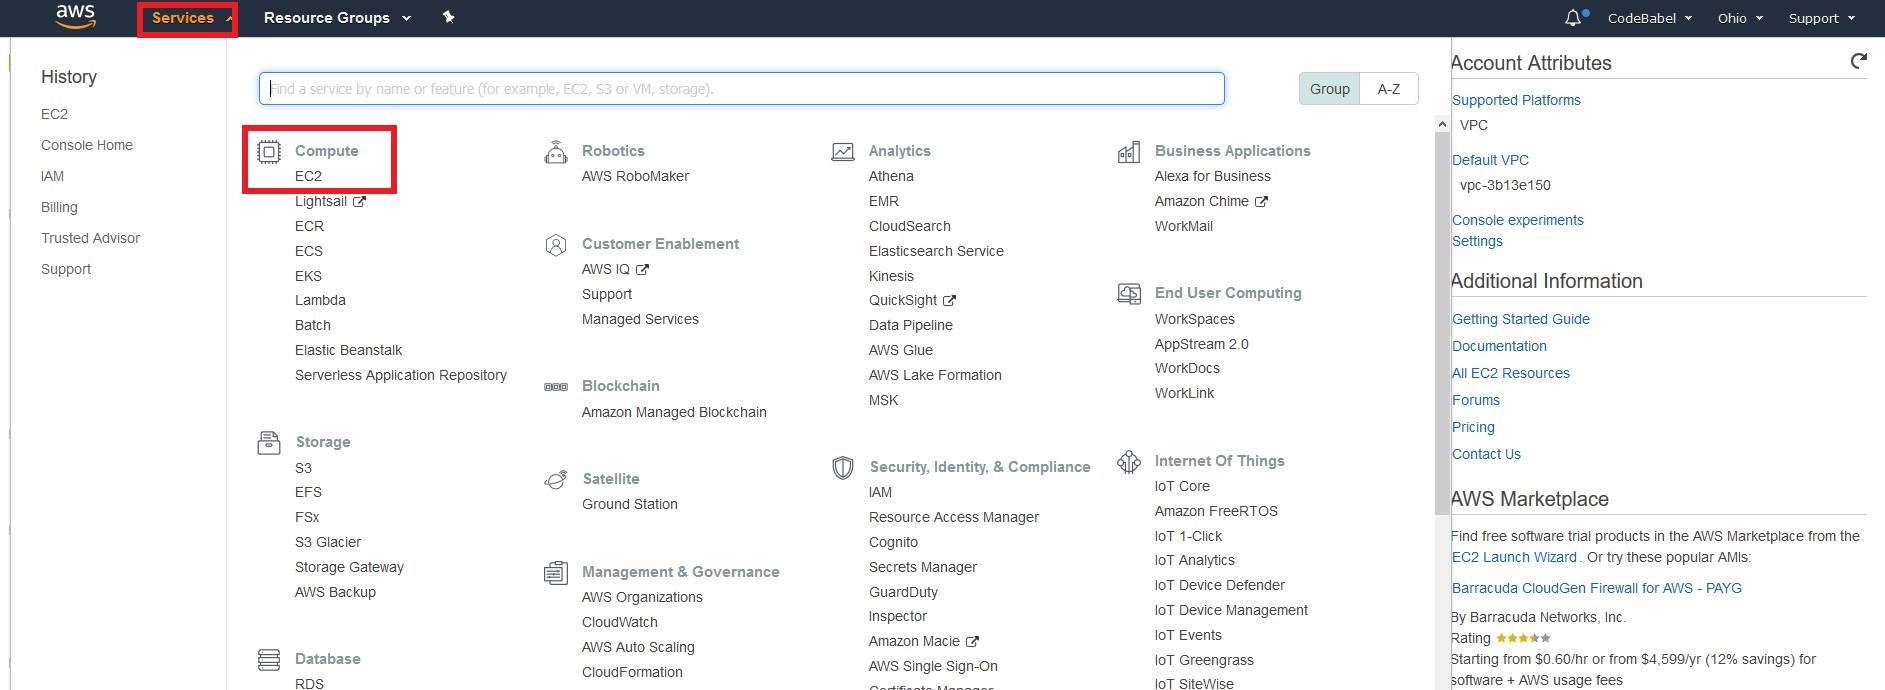
step 1:
Login to AWS and go to the AWS management console. Go to “Services” and click on “EC2” under “compute” section.
step 2:
Click on “Launch Instance” in the EC2 dashboard. Note that I am configuring the EC2 region to run in Ohio region. We can choose the region we want based on the requirement.

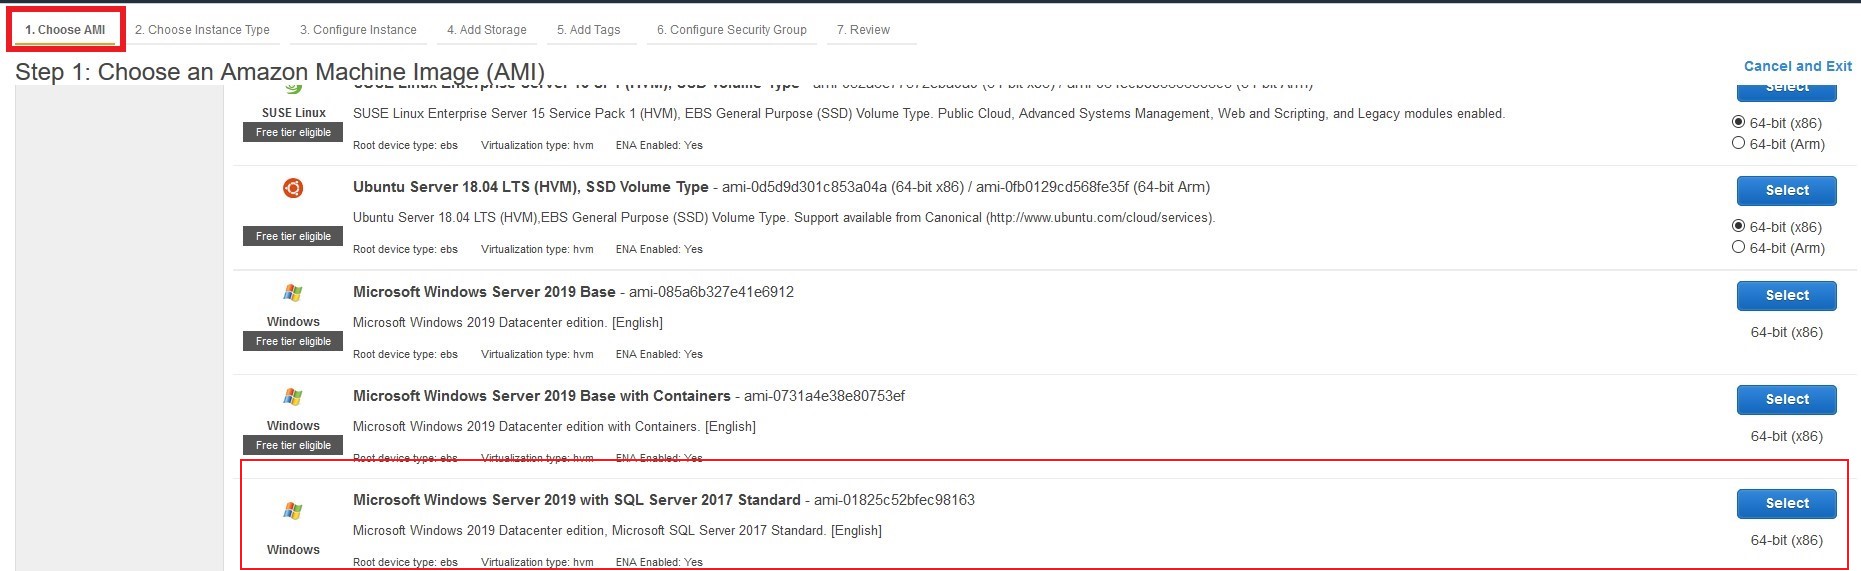
step 3:
I am selecting the Microsoft Windows Server 2019 base AMI here. Let’s click on “select” option.
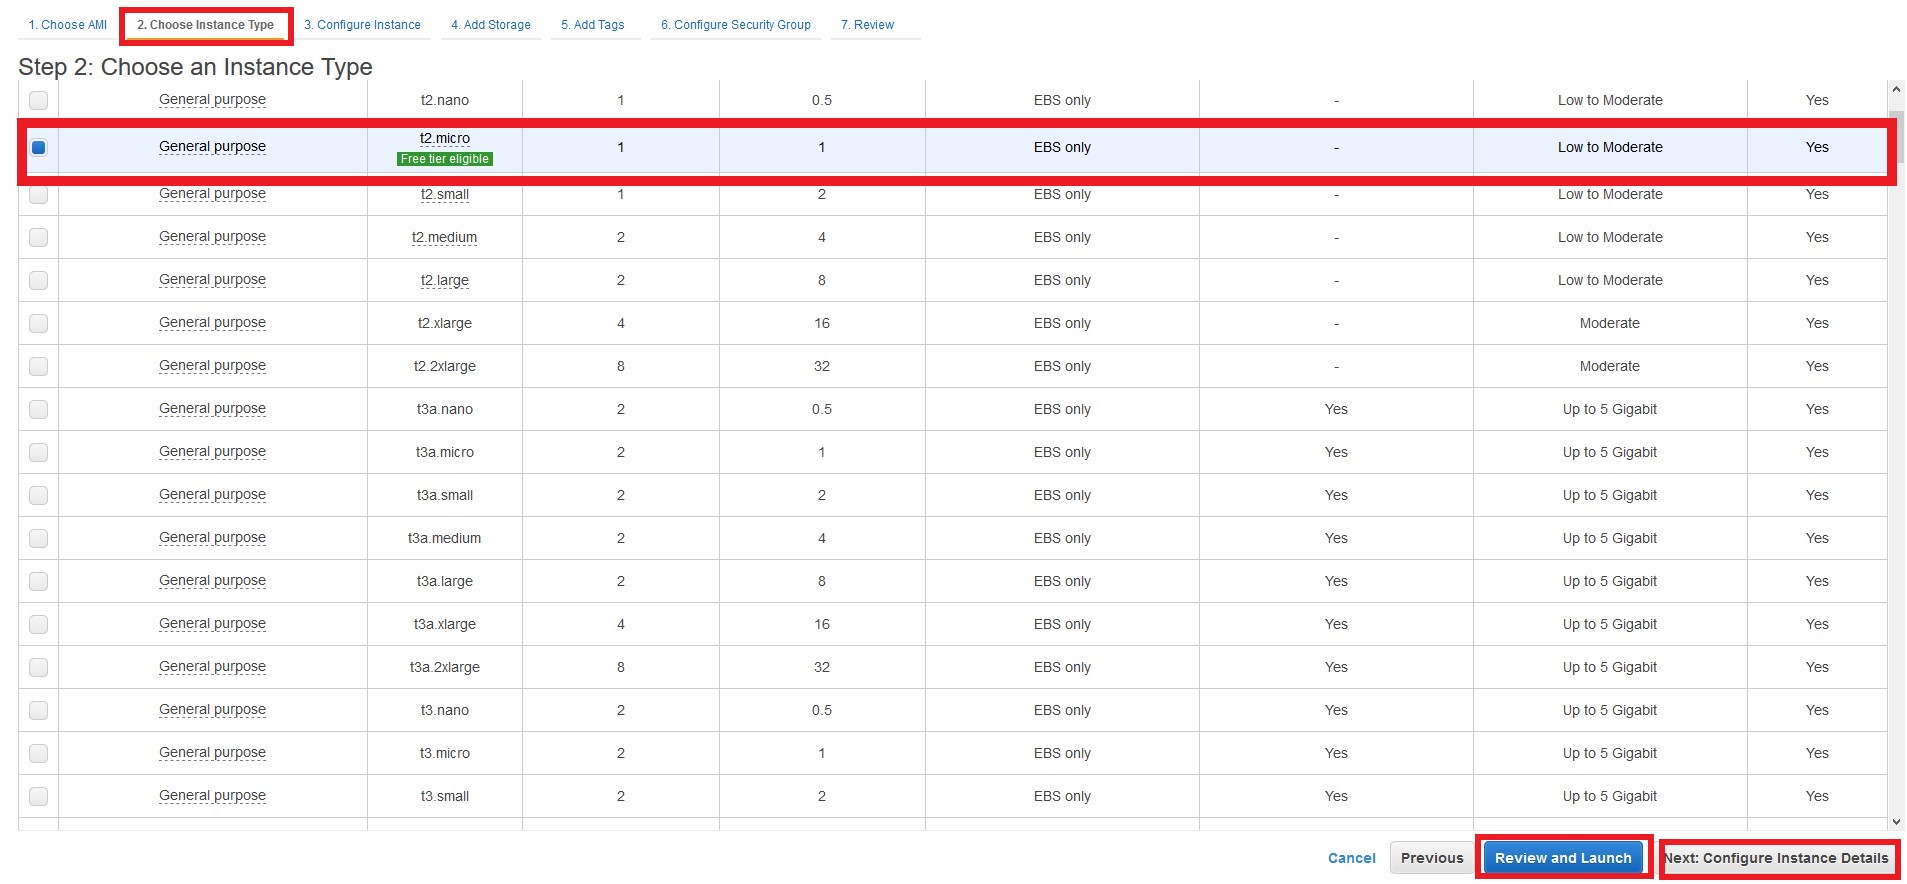
step 4:
Here, Let’s select General Purpose t2.micro type as it is eligible for free tier. It has 1 vCPU and 1GB memory, which should be sufficient for our demo.
If we want to keep it simple, we can select “Review and Launch” option. This will basically launch your EC2 instance with the default configurations.
If we want to configure the instance with any specific details such as, assigning it to a VPC and a subnet, IAM role or a placement group, etc., we can click on “Configure Instance Details” option.
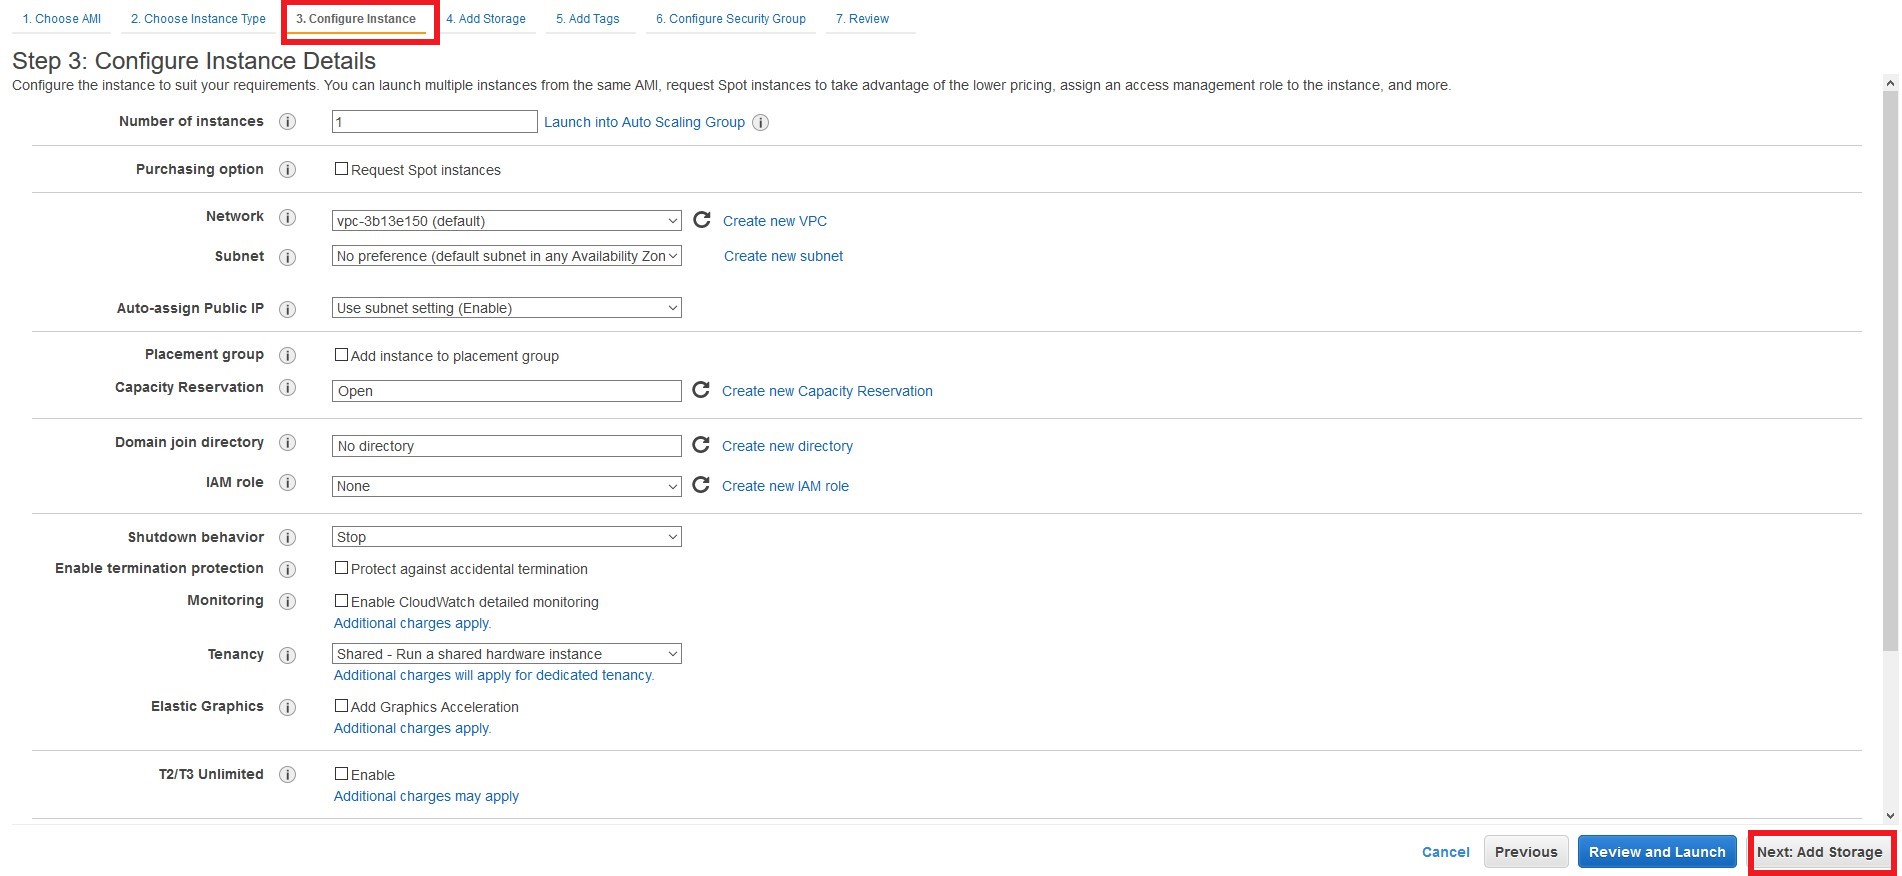
step 5:
In the “configure Instance” window, we are giving the following details for the demo.
Number of instances = 1, Network = default VPC, subnet = No preference, placement group= None, Cloudwatch Monitoring = None. We will discuss about all these topics in the next articles. Once they are specified, we can click on “Add Storage” option.
step 6:
In the “Add Storage” window, we can see by default a root volume is available. We can also choose the type and size of the volume. Also, there is an option available to encrypt the root volume if necessary.
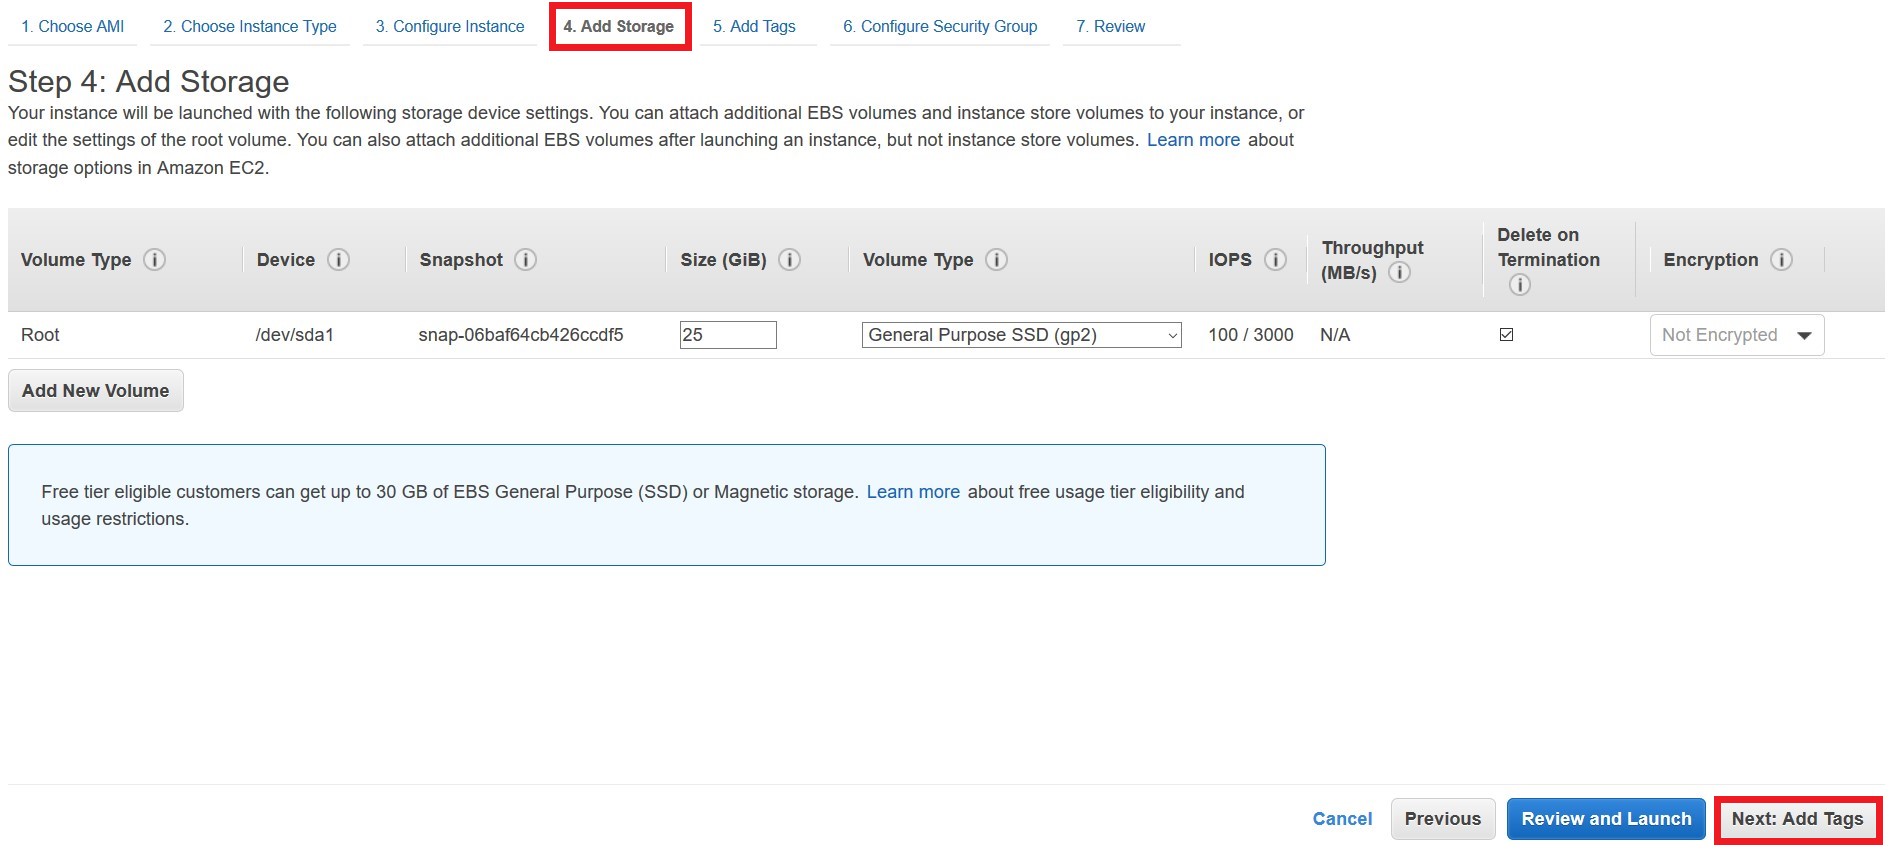
In some cases the root volume may not be enough for storage. In that case, we can also add additional volumes of storage as per the requirement by selecting the “Add New Volume” option. These volumes are called EBS Volumes. We will discuss about EBS volumes and its types in the future articles.
Once the configurations are done here, let’s click on “Add Tags” option.
step 7:
We can specify meaningful Tags and its value under “Add Tags” window. Here, We are adding a tag name “Demo” with value “EC2demo”. After that, let’s click on “Configure Security Group” option.

step 8:
Let’s create a new security group called “WindowsEC2demo” and give a meaningful description. By mentioning only the required IP addresses in the source field, we can give granular permissions thereby highly securing the instance. But for this demo, we are exposing RDP, HTTP and HTTPS ports of the EC2 instance to all IP addresses by clicking “Add Rule” option as shown below.

After this, let’s click on “Review and Launch” option.
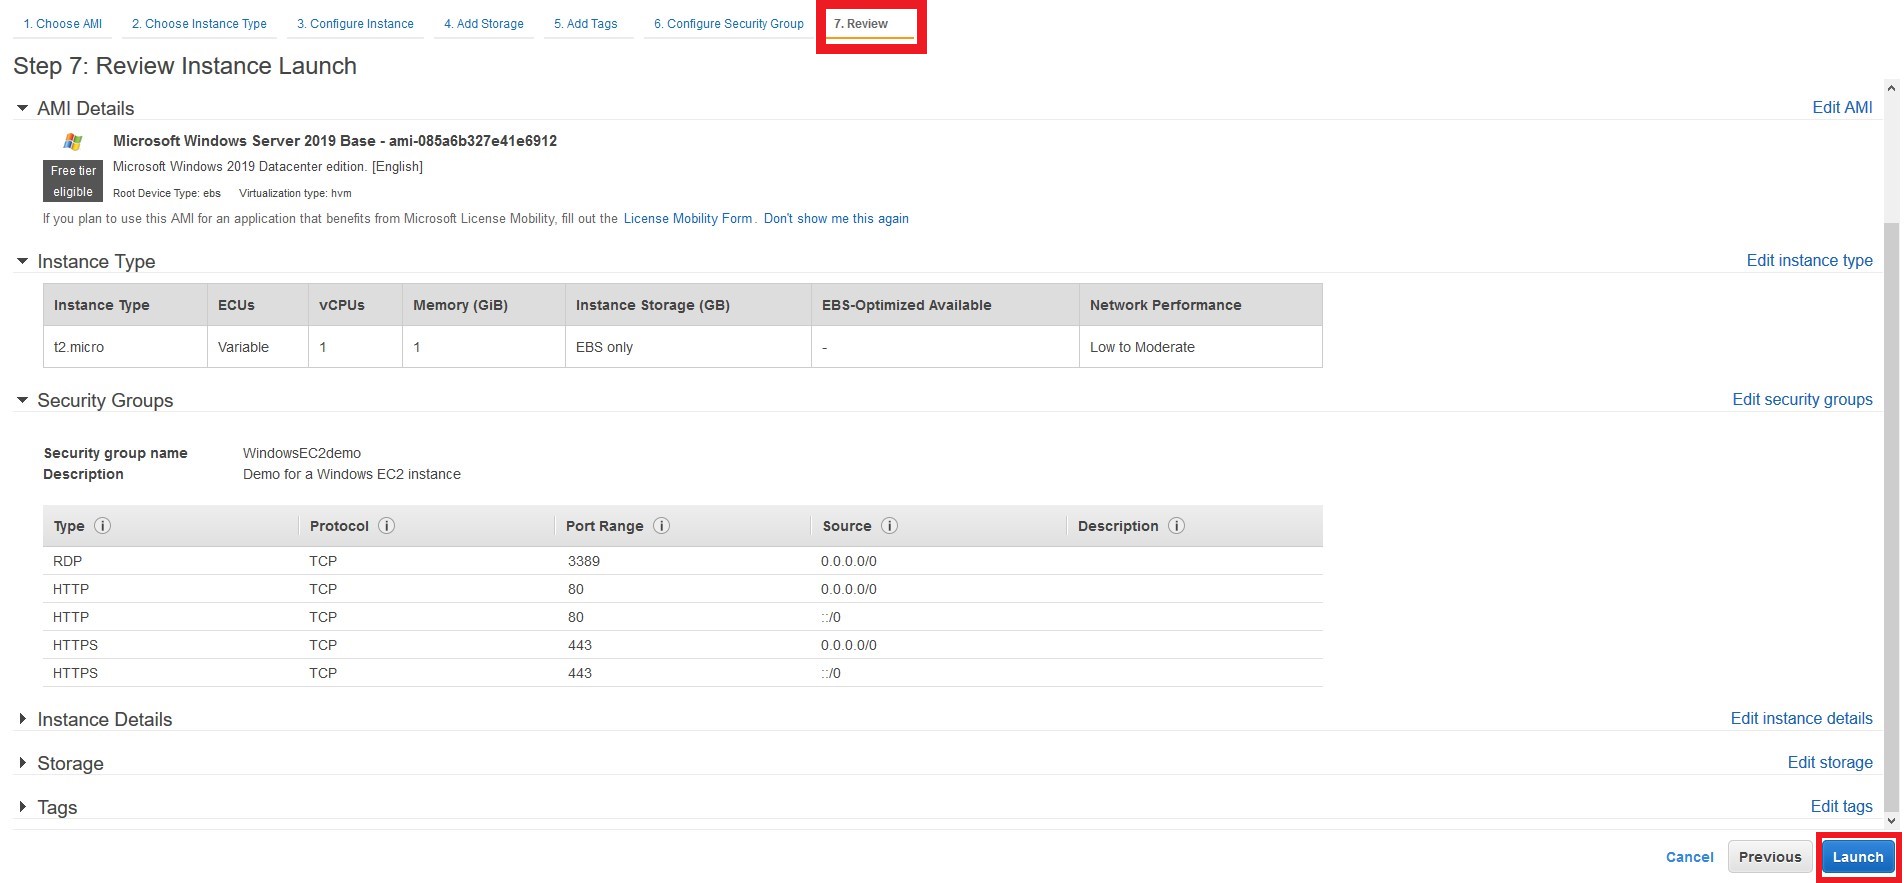
step 9:
This will bring us to the review page where we can review and edit configurations if needed. After that, we can click on “Launch” option.
Connecting to the EC2 instance
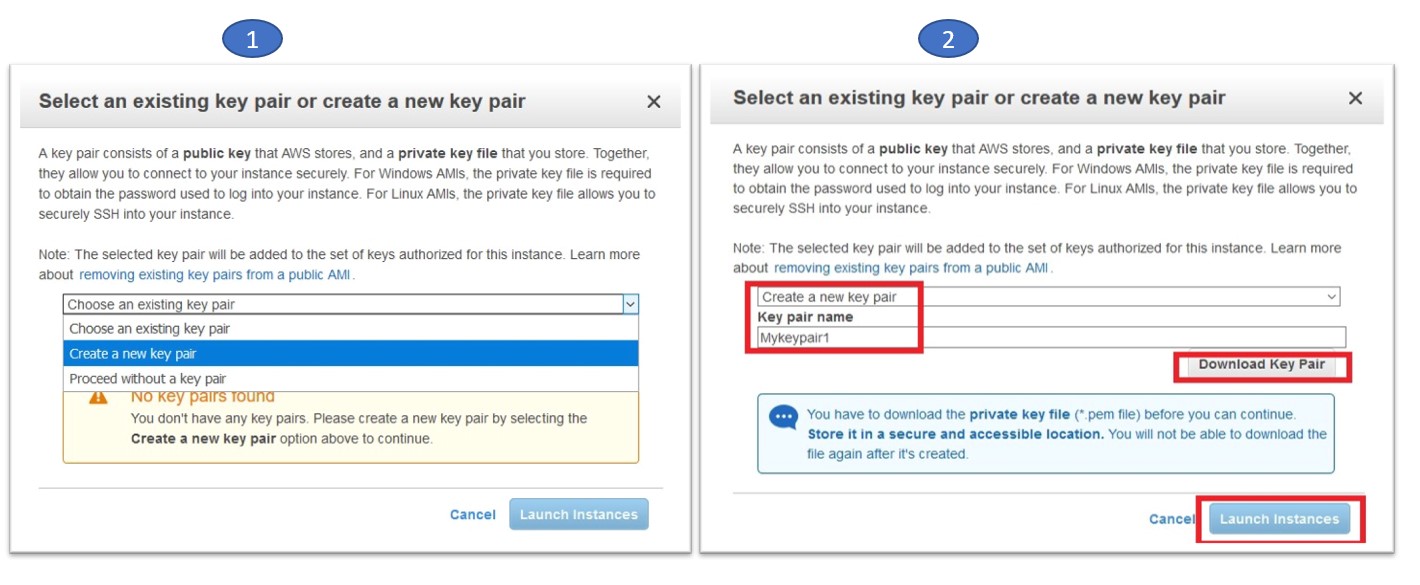
step 10:
A window will appear as below with the details regarding Key Pair for accessing the EC2 instance. Let’s select “Create a new key pair” -> name = “Mykeypair” -> Select “Download Key Pair”. Download and key pair and store it in a secure location and then click on “Launch Instances”
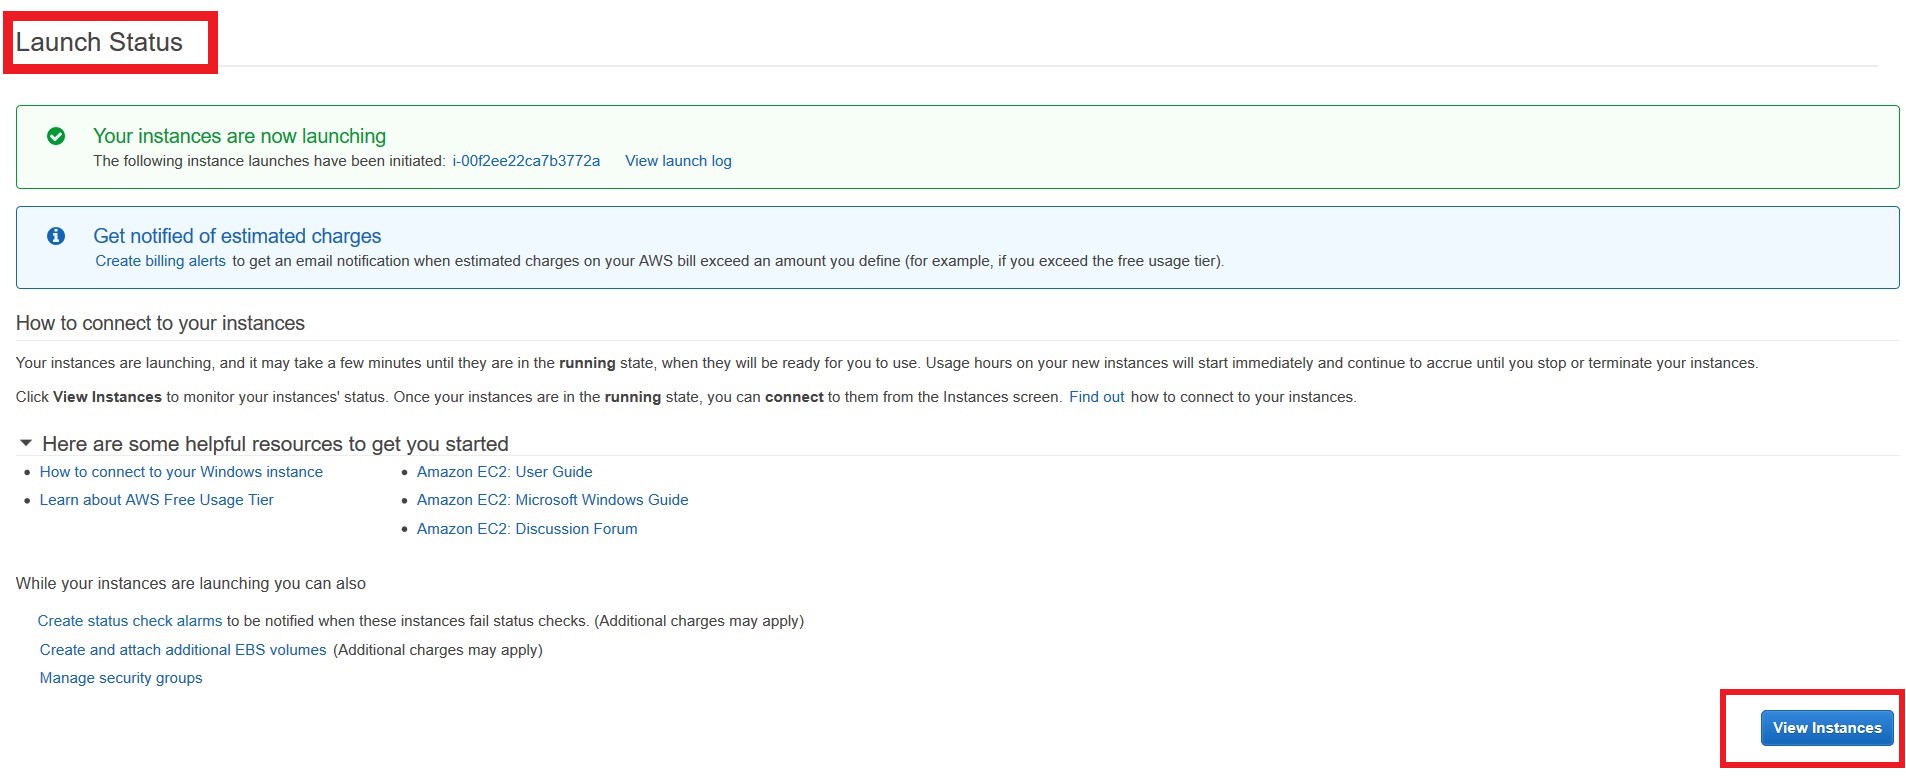
You will get a Launch status window as below. After that, click on “View Instances” which will then navigate to the Instances Dashboard.
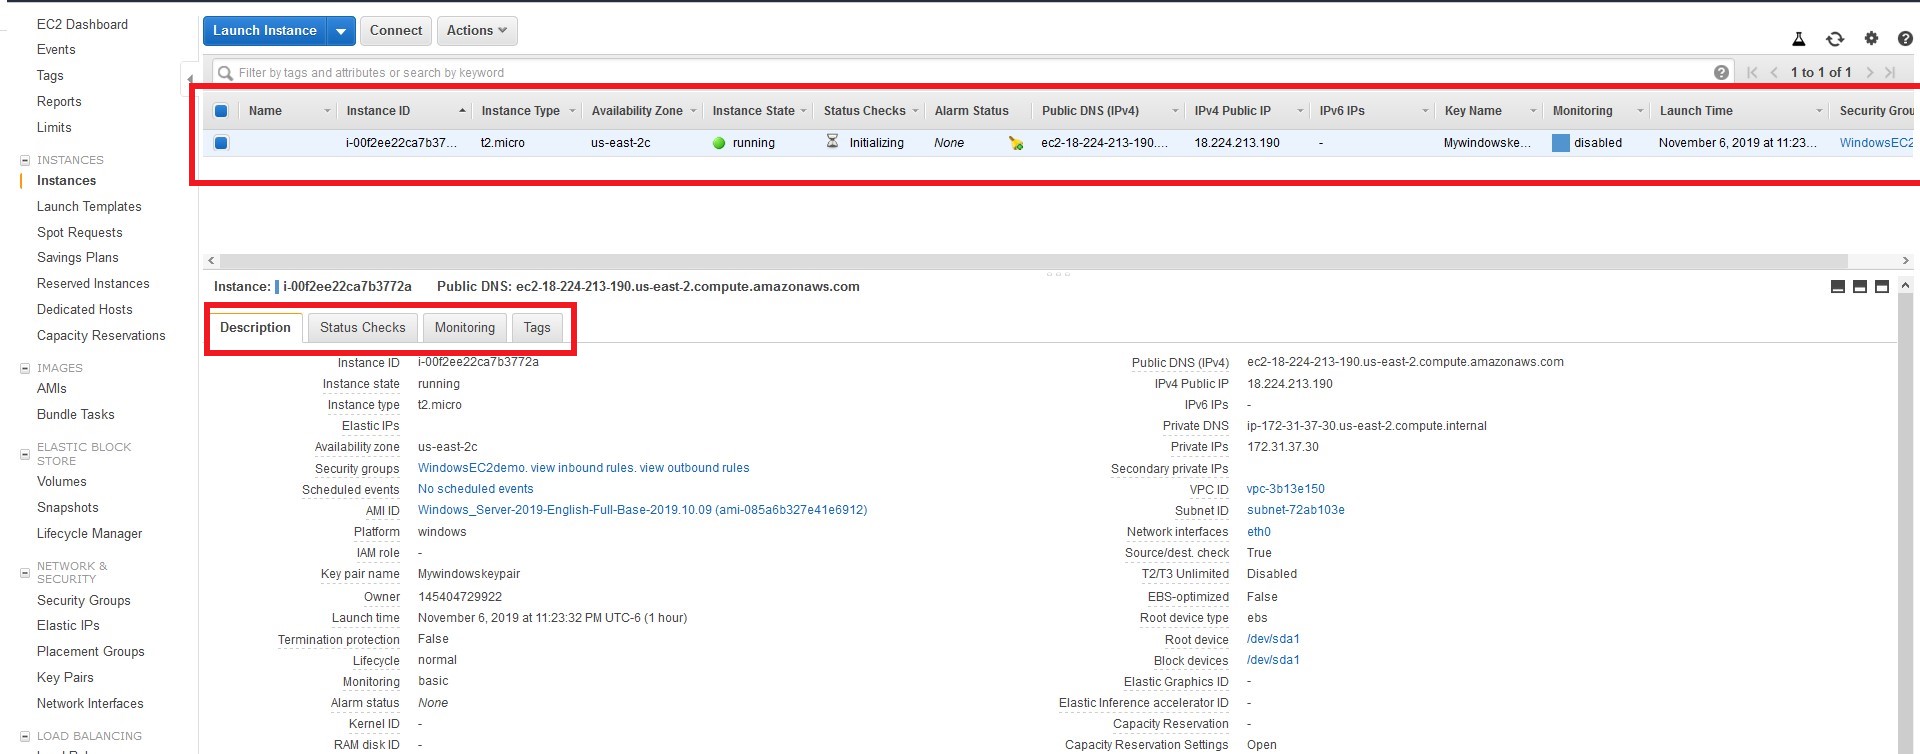
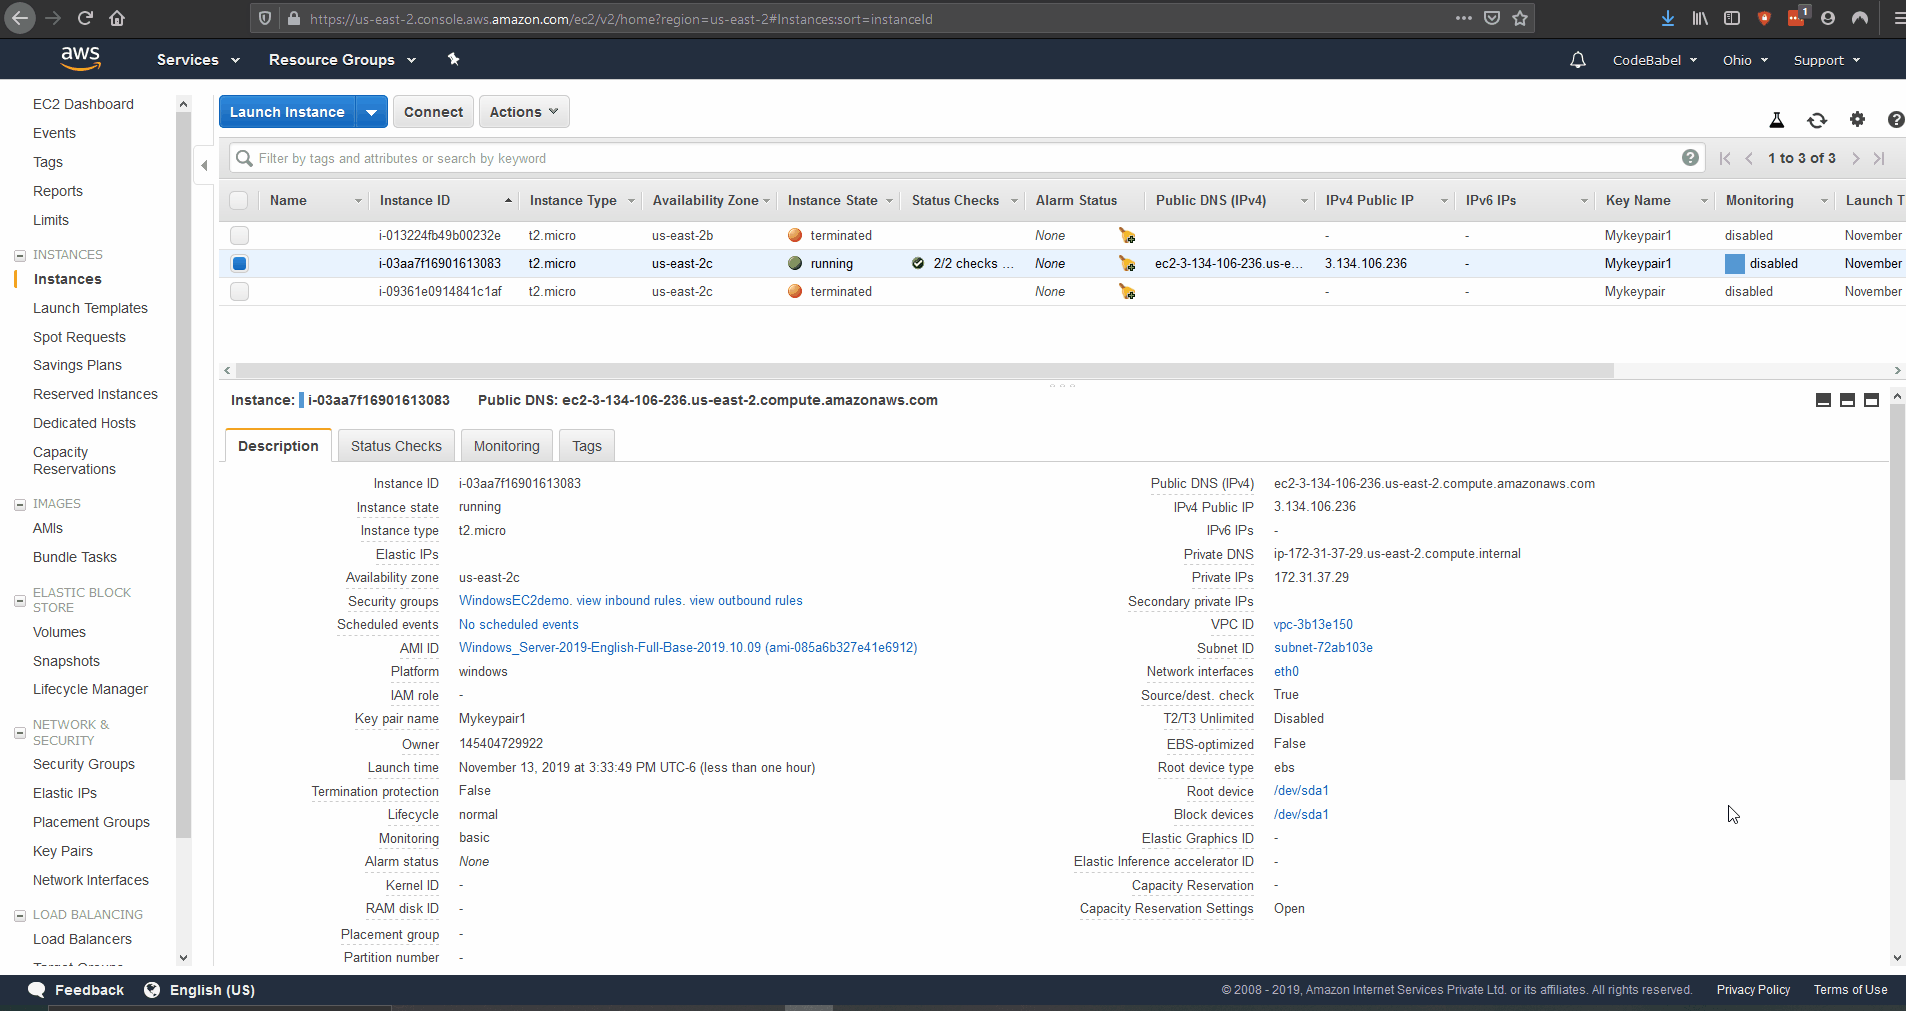
step 11:
You can see that the instance is created and it is in running state. We can also find a lot of details about the EC2 instance such as the public IP address, instance state, Instance type, etc in the dashboard. There is also a panel below the dashboard where we can view and edit configurations. This will be very useful in advanced configurations.
step 12:
In order to connect to the EC2 instance we first have to generate the password to connect to the instance using the key value file which has been previously downloaded. For this click “Get windows password” on the selected instance in the dashboard, and browse and choose the keyfile and click on “Generate password”. The decrypted password will appear. Let’s copy the password. It is recommended to change the password after logging in for security purposes. This is shown in the below clip:
If an error screen appears saying that the passwords are not yet generated, then close the window and try again after some time.
step 13:
On the selected instance in the dashboard, let’s click on “connect” -> “Download Remote Desktop file”. Paste the password in the password field once the remote desktop is open.
Whoo! We have successfully logged into the instance. We can convert this instance to a web or app server or even a Database server based on our needs with required security for our application to run. Since we have opened the instance to the world, we can see that we can connect to the internet using the browser. The steps are shown in the below clip.

Terminating the EC2 instance
step 14:
In order to stop/reboot/terminate the instance, we just have to select that instance and click on “Actions” -> “Instance State” and choose among “Stop”, “Reboot” or “Terminate” options.
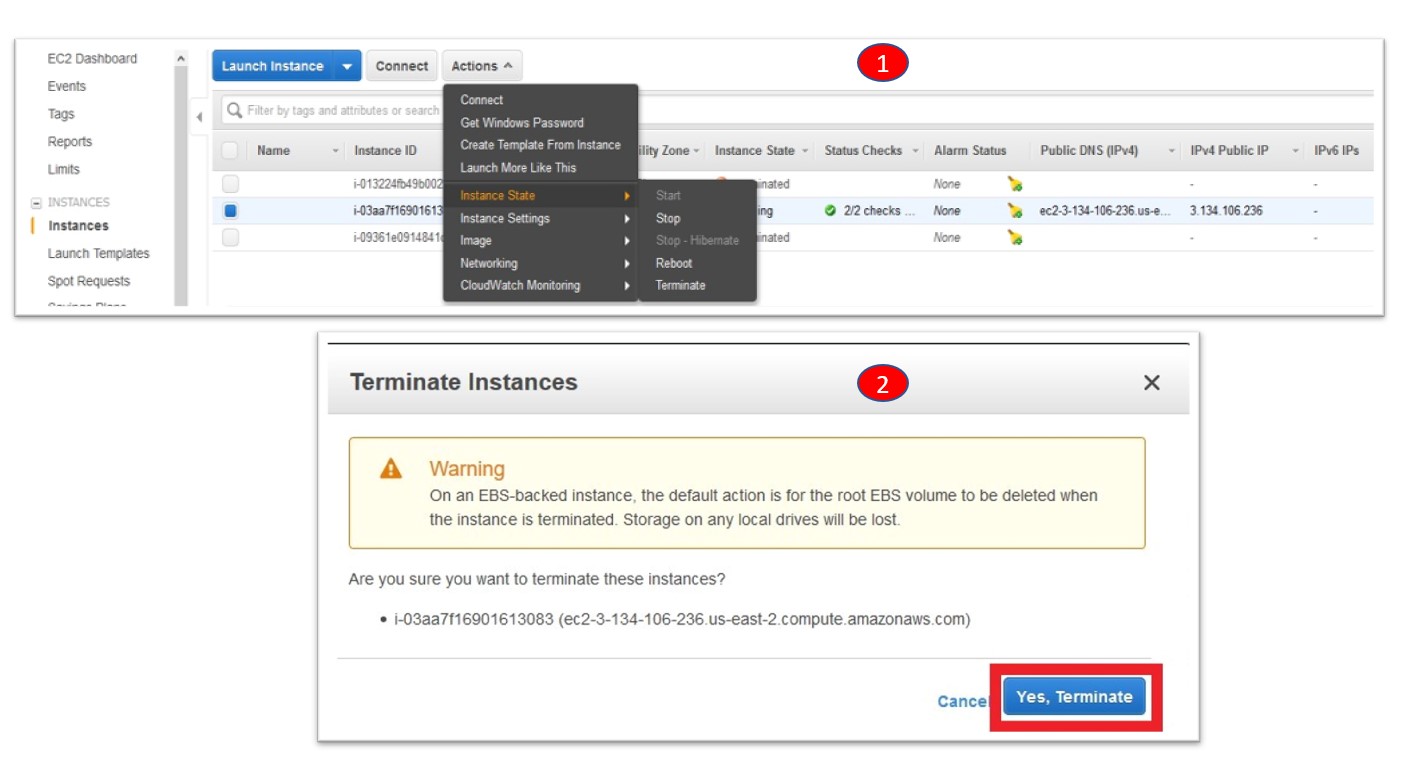
Also, note that if we either stop or terminate the instance, we will lose any data stored on ephemeral storage of that instance. But restarting the instance will not remove those data. Since, in our demo, we have used only ephemeral storage option, all the data will be lost once we terminate or stop the instance. To avoid this, we have to opt for other storage options which we will learn about in future articles.
Conclusion
Yup! Its that easy to spin up an EC2 instance in AWS. You can find more information about AWS EC2 here. Please note that we configured and ran an EC2 instance using AWS console. We can do the same using AWS CLI and API commands as well. But that’s a topic for another article 🙂
Please share your thoughts, questions, and suggestions in the comment section below and do subscribe to our blog to stay up to date on any new articles.