GIT Branching and Merging with Jenkins Multibranch Pipeline
The concept of branching and merging in Source Code Management tools like GIT is very important for delivering larger and complex applications. Branching is required in order to achieve a parallel or concurrent development of the code. Too many branches may make development very complex or too few may hinder faster development. The right branching strategy makes it easier to deliver the code especially for teams working in agile, which involves a multi-developer environment with shorter delivery time, without stepping over each other’s code.
Now, let’s talk about the evil twin of branching – the merge. Merging the code as early and as often as possible, corresponds to a step closer towards achieving Continuous Integration and Continuous Delivery.
In this article, we will discuss the branching and merging strategy using GIT which will work well for agile teams. We will also see how Jenkins Multibranch Pipeline compliments it to give a seamless Continuous Integration experience.
Below are the things we will discuss in this article:
Why GIT?
The main advantage of GIT is that the concept of branching and merging is extremely cheap and simple. Hence branching and merging the source code need not be scary anymore.
Below are a few other advantages of GIT.
Distributed Version control: In GIT, every developer has a copy of the entire repository with the entire history of changes. As a result, it will allow developers to work productively resulting in faster development. This is because there is no need to communicate with a central server every time.
Feature Branch Workflow: It provides an isolated development environment. In other words, when a developer wants to add/modify a feature, they always create a new branch. This will ensure the master branch always contains the stable code – production ready code.
Pull Requests: A pull request is a way in which, a developer can request to merge his code changes in one branch with some other branch. It also enables code review of changes before merging happens.
Why Jenkins Multibranch Pipeline?
A multibranch pipeline project simply scans the source code repository and creates a pipeline job automatically for each branch containing a Jenkinsfile. For example, whenever a developer creates a new branch with a Jenkinsfile, it creates a pipeline job and executes it automatically. Hence it eliminates the manual creation and maintenance of Jenkins pipeline jobs. It is also useful for validating pull/change requests. It can automatically build the new branches, thereby drastically reducing the number of “surprises” upon the final merge. Therefore, it helps to keep the main code line stable.
Basic GIT Branching and Merging Model
There are many branching and merging strategies that a team can adapt based on their requirements. In this article, we will look at a basic model that will work well for applications following the agile life cycle.
Overview
Below is the branching and merging strategy model using GIT as a version control tool.

The following are the branches in the above GIT branching and merging strategy.
Master Branch: The master is the main branch. It has the fully tested and stable code that is working successfully in production. The code here acts as the base code for all the future developments and releases.
Feature Branches: It is the place where active development takes place. A feature branch may contain changes for existing features or a new feature for the next release. The developers create multiple feature branches according to the requirement and test each feature branches individually. After that, the developers will merge all the required feature branches to the release branch by using Pull Requests. In this article, we have created a feature branch “Feature_Feat1”.
Release Branches: Release branch supports in the preparation of next production release. For every release, a corresponding release branch will be created. All the features that are aimed for a particular release will be merged to that release branch. Here, the team will integrate and test all the features. Once it is successful, it is merged with the master branch by a Pull Request to move it to the production. Here, we have created a release branch “Release_Jan19”.
Hotfix Branches: This branch is created when there is a critical bug in the production which needs to be resolved immediately. This branch contains the existing production code taken from the master branch. The bug is fixed and tested here. Finally, the code is merged back to the master branch for fixing the production issue.
Setting up a Sample GitHub Repository and Multibranch Pipeline Project
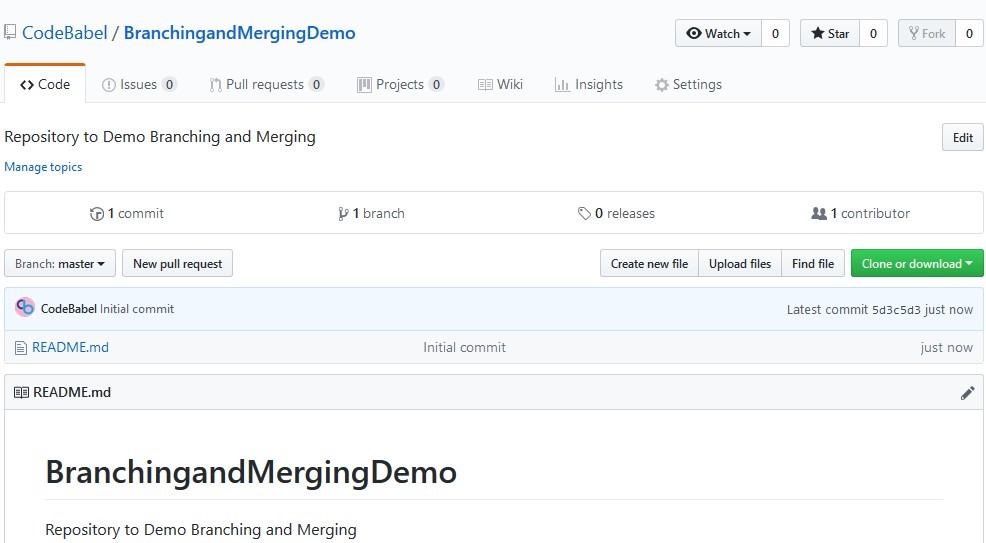
First of all, let’s create a simple GitHub repository for a sample application.
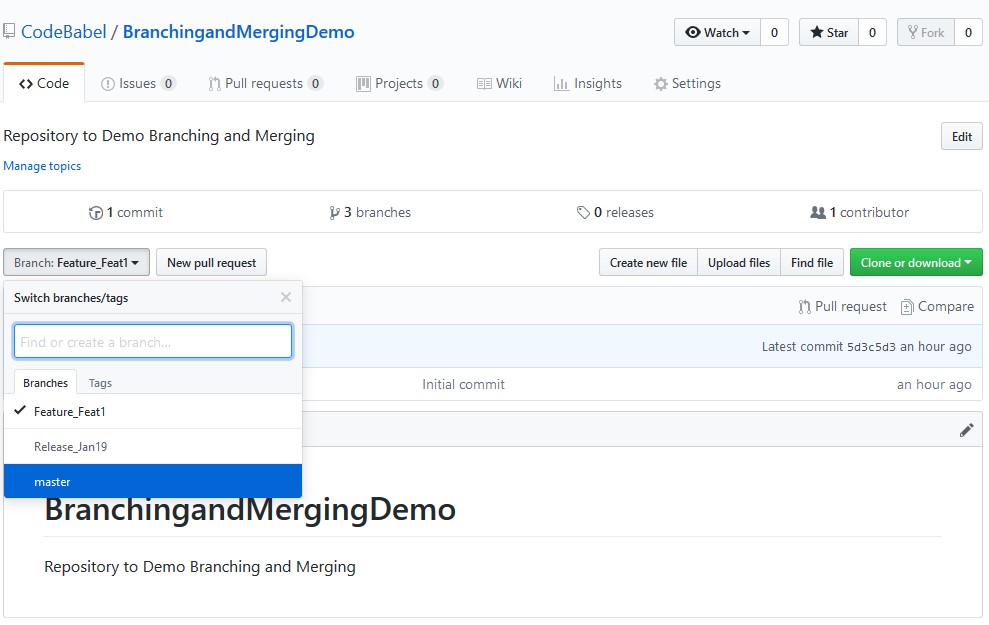
“BranchingandMergingDemo” is the name of the GitHub repository. Note that it creates the “master” branch automatically as it is the main branch.
We will also create a feature branch “Feature_Feat1” and a release branch “Release_Jan19”.
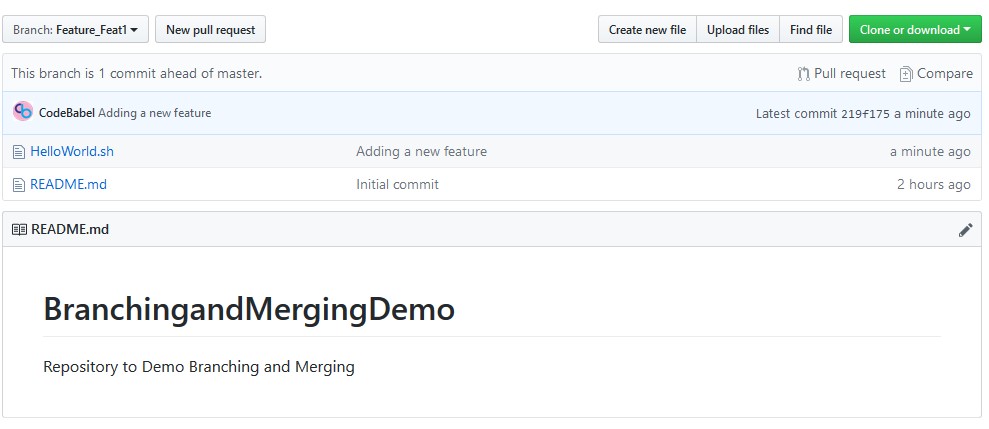
Now, let’s focus on “Feature_Feat1” branch as this is where actual development takes place. Here, we have created and committed a simple “HelloWorld.sh” file as a new feature.
We will have a simple Jenkinsfile in all the branches which will perform checkout and deployment to the desired environment. It will look as below.
node {
 stage('checkout') {
  checkout scm
 }
 stage('deploy') {
  echo 'branch name ' + env.BRANCH_NAME

  if (env.BRANCH_NAME.startsWith("Feature_")) {
   echo "Deploying to Dev environment after build"
  } else if (env.BRANCH_NAME.startsWith("Release_")) {
   echo "Deploying to Stage after build and Dev Deployment"
  } else if (env.BRANCH_NAME.startsWith("master")) {
   echo "Deploying to PROD environment"
  }

  sh ""
  "chmod +x HelloWorld.sh
  . / HelloWorld.sh ""
  "

 }
}
Let’s create a multibranch pipeline project now. The configuration looks as below.
The credentials used is a GitHub Personal Access Token. Refer to this link to create one. Note that, after clicking on “Save”, it automatically creates a job for each branch which has Jenkinsfile in it by scanning through the repository.
Creating our first Pull Request
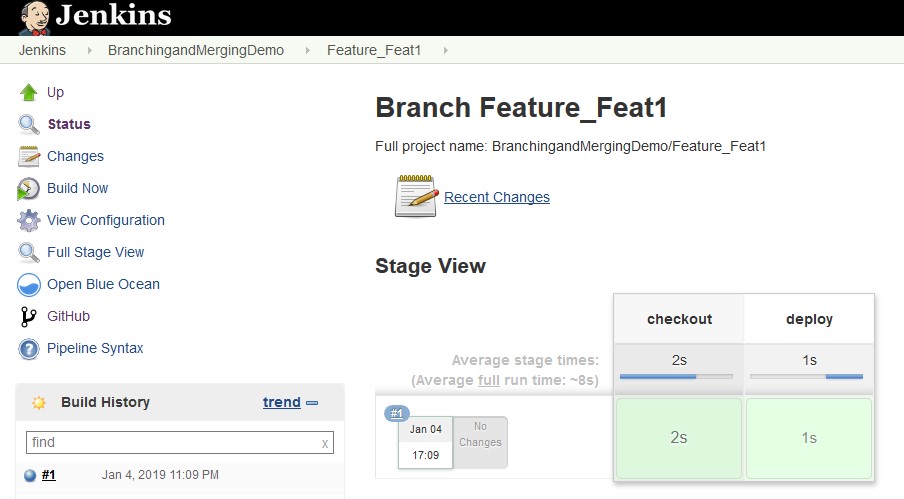
We can see the job created for Feature_Feat1 is successful as shown below.
Now let’s create our first Pull Request PR1 to merge our changes in Feature_Feat1 branch to Release_Jan19 branch.
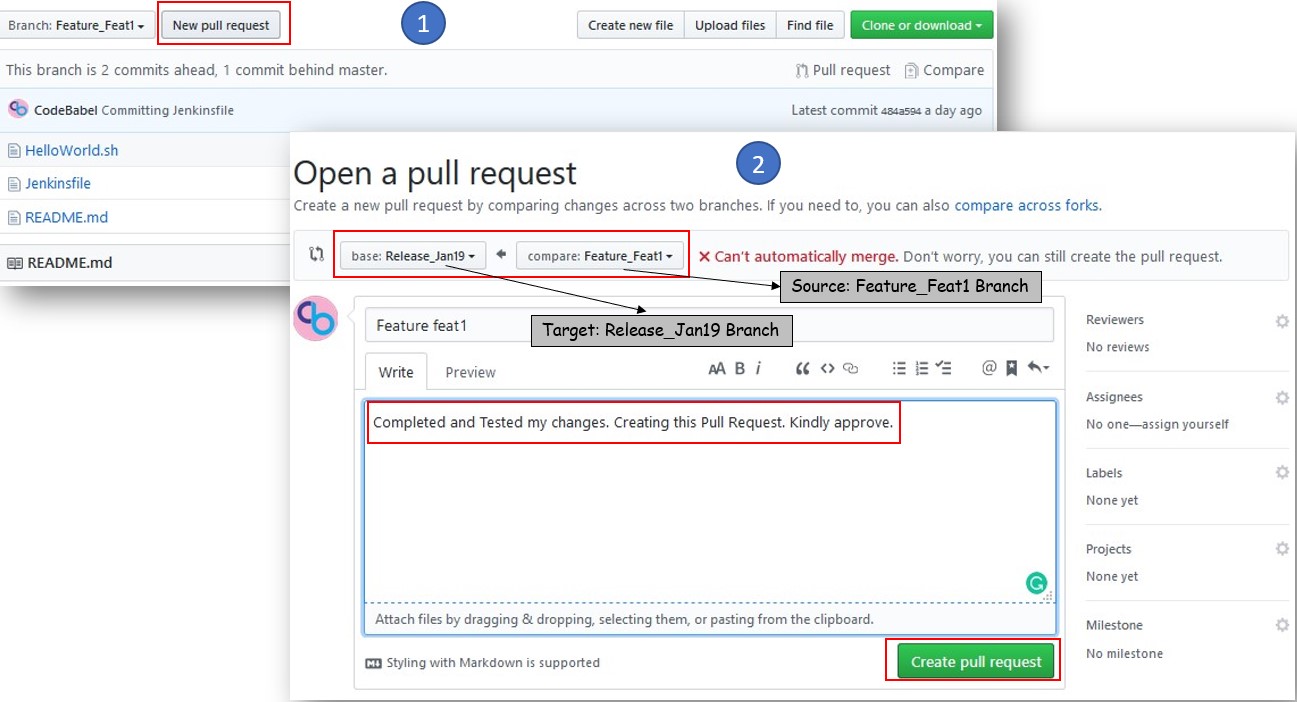
Here comes the interesting part about Multibranch Pipeline projects. As soon as we create the Pull Request, our Multibranch Pipeline project runs an intermediate job PR1 created from an offline branch with the same name which consists of the merged changes from the source and target branches. We can see this intermediate job in the Pull Requests view. If the job is successful, it means that the requested changes will work in the target branch even before it is merged. This will make it easier for the code reviewer to merge the changes with confidence!

Now, let’s approve the Pull Request and see what happens!
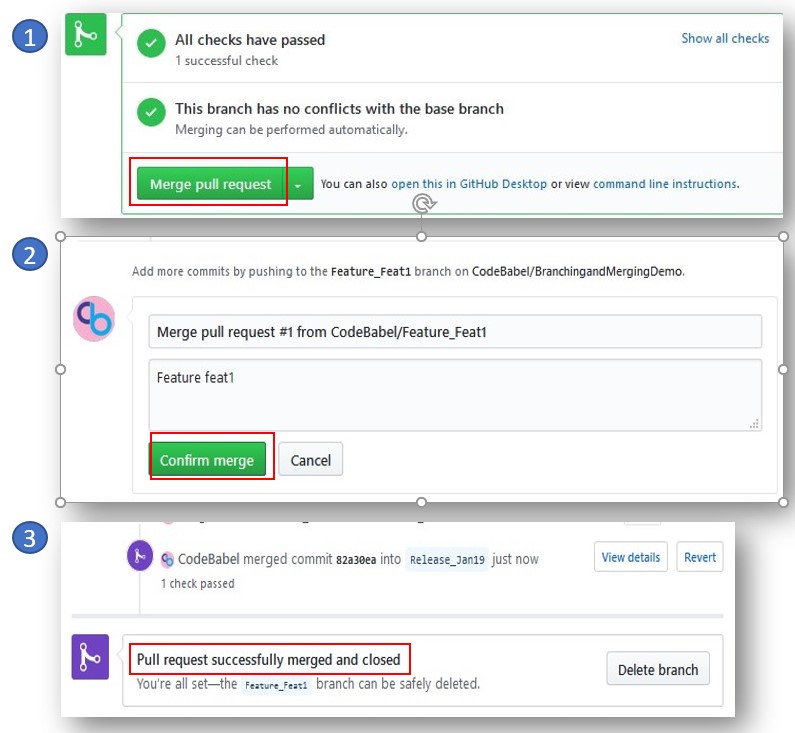
Once the Pull Request is approved and the changes are merged to the Release_Jan19 branch, we can notice that the intermediate job in the Pull Request View is deleted automatically.
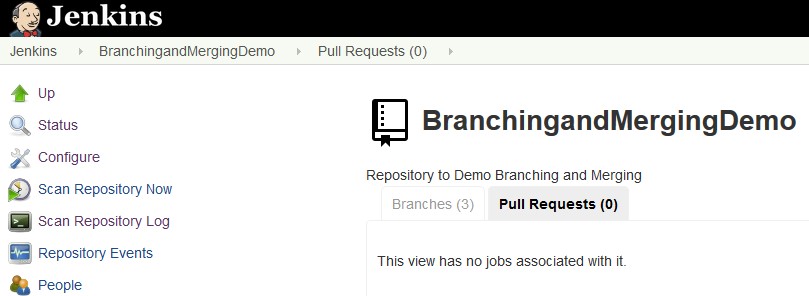
Now the Multibranch Pipeline Project will trigger the pipeline job corresponding to Release_Jan19 branch with the latest merged changes and this process goes on 🙂
Conclusion
Phew! We have reached the end of this article. Here, we have learned some best practices about branching and merging strategy using GIT as our SCM tool and how it makes the life of a development team easier. We have also seen some interesting things that the Jenkins Multibranch Pipeline can do. In addition, it can also be used in conjunction with our branching strategy to achieve a great Continuous Integration experience.
All the codebase used in this article is available here! Please share your thoughts, questions, and suggestions in the comment section below.
Please subscribe to our blog to stay up to date on any new articles and share your feedback below!