
Working with GitHub Actions
GitHub has become one of the most widely used Source Code Repository. Its Distributed Version Control System helps the developers for faster development and Integration of their code. Recently, it launched GitHub Actions in beta which enabled developers to create automated workflows to build, test, and deploy their source code on GitHub.
In this article, we will discuss about GitHub Actions and how it can be used to build an automated software development life-cycle workflow.
Below are the things we will discuss in this article:
About GitHub Actions
Using GitHub Actions, we can create custom workflows that will help to build, test, package, release or deploy the code without leaving the GitHub UI. It enables us to build Continuous integration and Continuous Deployment capabilities directly in our repository. Here are some important features about GitHub Actions.
YAML based process: The workflow is written in YAML. Hence it is easy to create, read and use the actions that make up the workflow.
One Place for everything: By using GitHub Actions, we can build and test the developed code directly in our repository. There is no need to worry about integrating the source code repository with other build and deployment tools. Everything can be done in one single place.
Easy to integrate code: Since enabling CI/CD directly in the repository is possible using workflows, creating merge requests(MRs), building, testing and integrating them become way more seamless.
Predefined Templates: GitHub Actions lets you create the workflow for your code.You don’t know where to start? Don’t worry, GitHub has got you covered. It allows you to select from a lot of predefined templates already available for various technologies and platforms to build and test the code. This lets you focus less on writing complex build and deployment scripts and more on building and testing the code.
“Dockerized” build environments: One of the important features of GitHub actions is that it enables us to create workflows running on Docker containers.
Basic Concepts of GitHub Actions
Similar to any other tool, GitHub Actions has few keywords. It is important to know and understand these terms before working on GitHub Actions.
Action: This is the smallest basic unit in the workflow. We can create our own actions or use actions from GitHub community. Group of individual tasks combine together to form a step.
Step: A step is a set of tasks performed by a job. Each step can run commands or actions. This is similar to functions. Each step will run in the same virtual environment.
Job: Set of steps combine together to form a Job. We can define dependency rules for each job. We can also run jobs sequentially or parallelly. Each job will run in a fresh instance of a virtual environment.
Workflow: It is a set of automated process that we can configure for our GitHub repository. Those processes can be a combination of multiple steps like build, test and deploy. It consists of one or more jobs. A workflow is similar to a template or blueprint.
Workflow run: Whenever a job is run through an event, an instance of the configured workflow runs. We can see a lot of details such as logs, actions, etc for each workflow run.
Workflow file: This file consists of all the workflows that we want to configure for that project in the repository. This is a YAML file which is stored in the root of the repository in the .github/workflows directory.
Virtual Environment: GitHub hosts a lot of Virtual environments to run the workflows. For example, Linus, macOS and Windows Virtual environments.
Event: It is a specific activity that triggers the workflow to run. For example, we can create an event such as to run the job once there is a push/pull request in a particular branch.
Demo on using GitHub Actions
Let’s go through a quick demo on how to use GitHub Actions to build a simple Application. The source code that I am using for this has a simple Hello World code written in Java which we are going to build with Gradle.
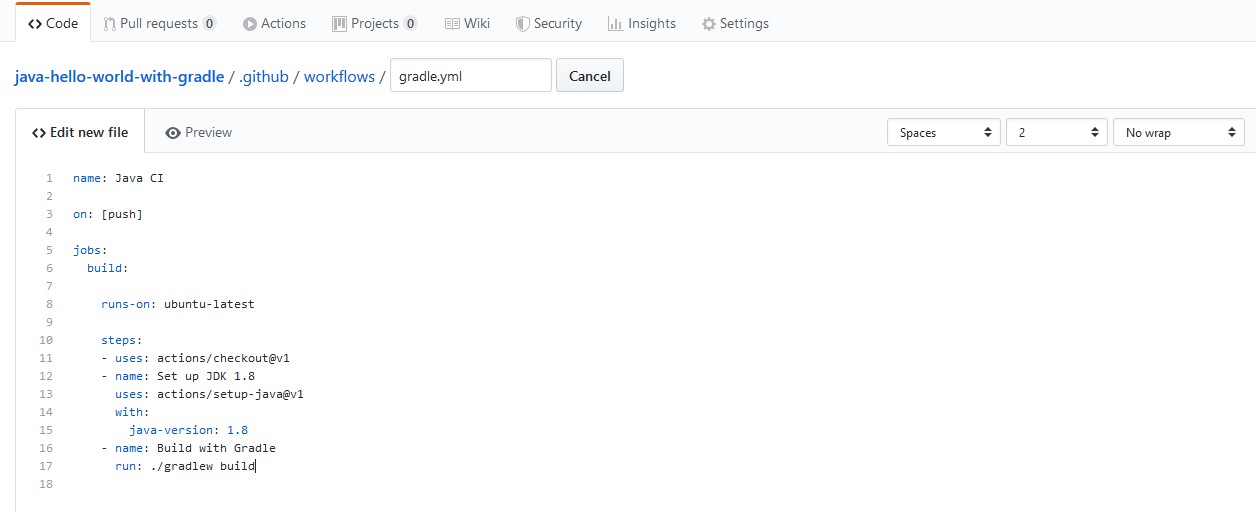
Creating a workflow file
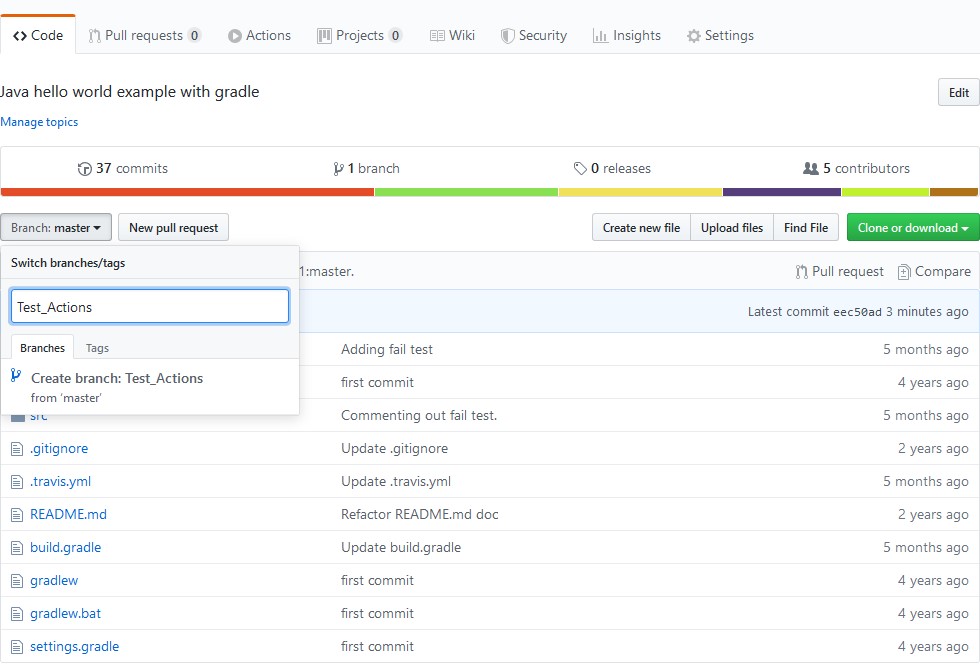
Let’s go to the repository and create a new branch for this demo. I have created a new branch called “Test_Actions”.
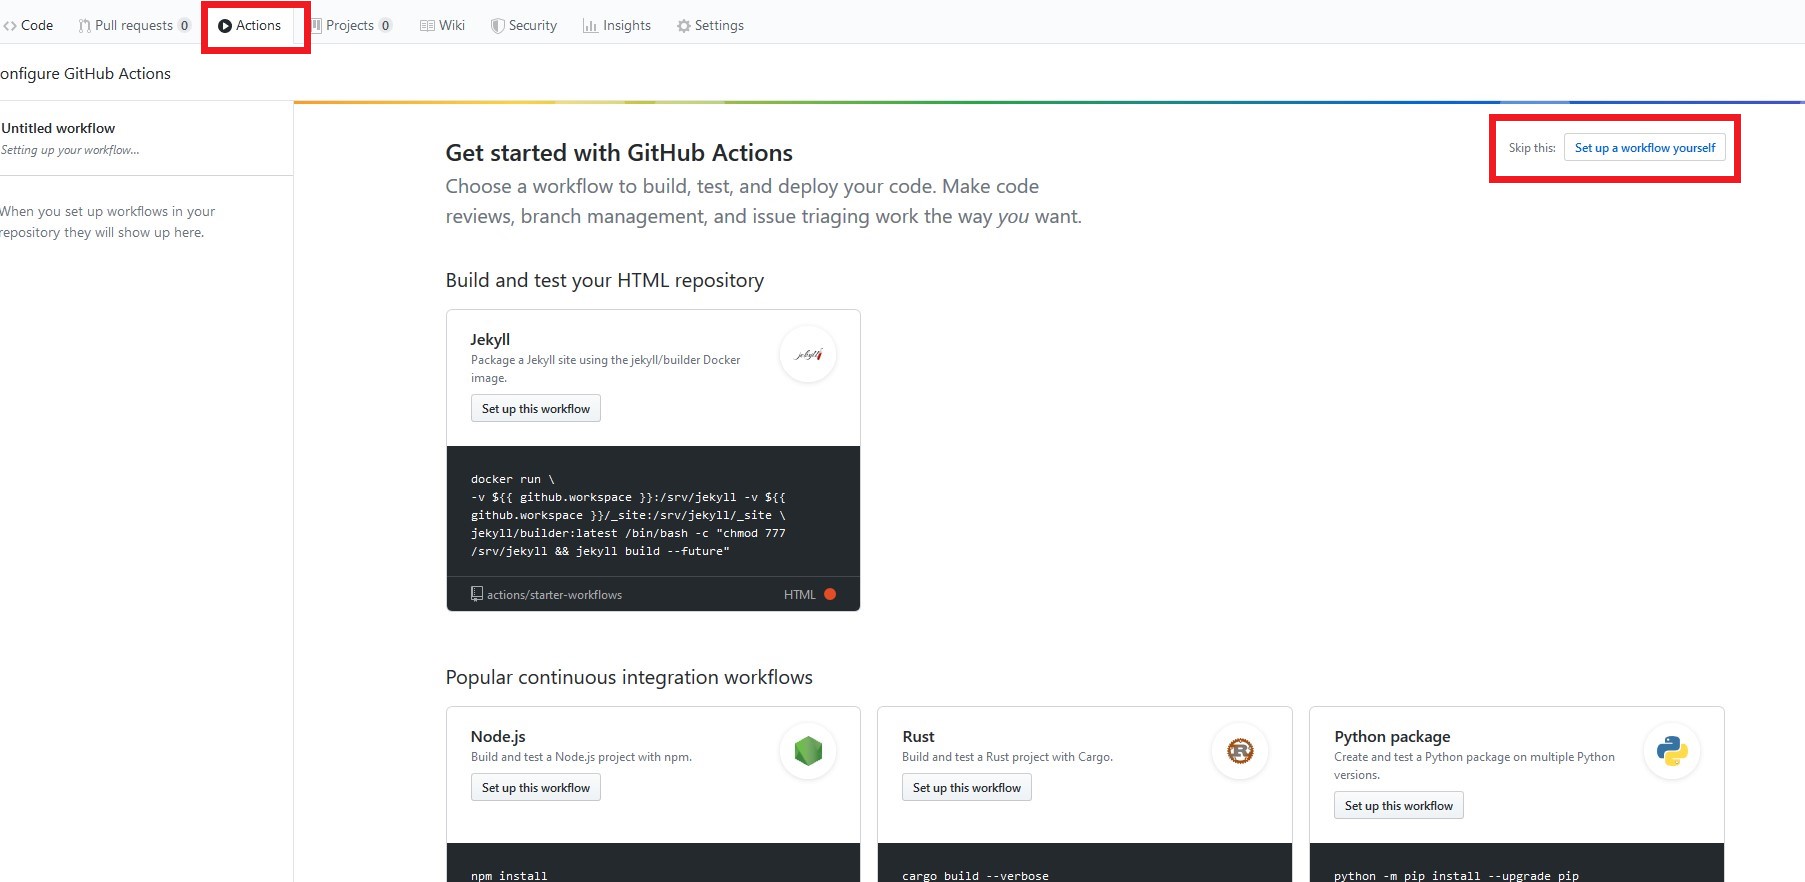
Next, to create the workflow YAML file, let’s click on the Actions tab. It will navigate us to a window where can start to configure the workflow.
GitHub analyzes the code in your repository and recommends CI workflows based on the language and framework in your repository. We can either use the template that GitHub suggests by clicking on them or we can create our own brand new workflow from scratch by clicking on “Set up a workflow yourself” option.
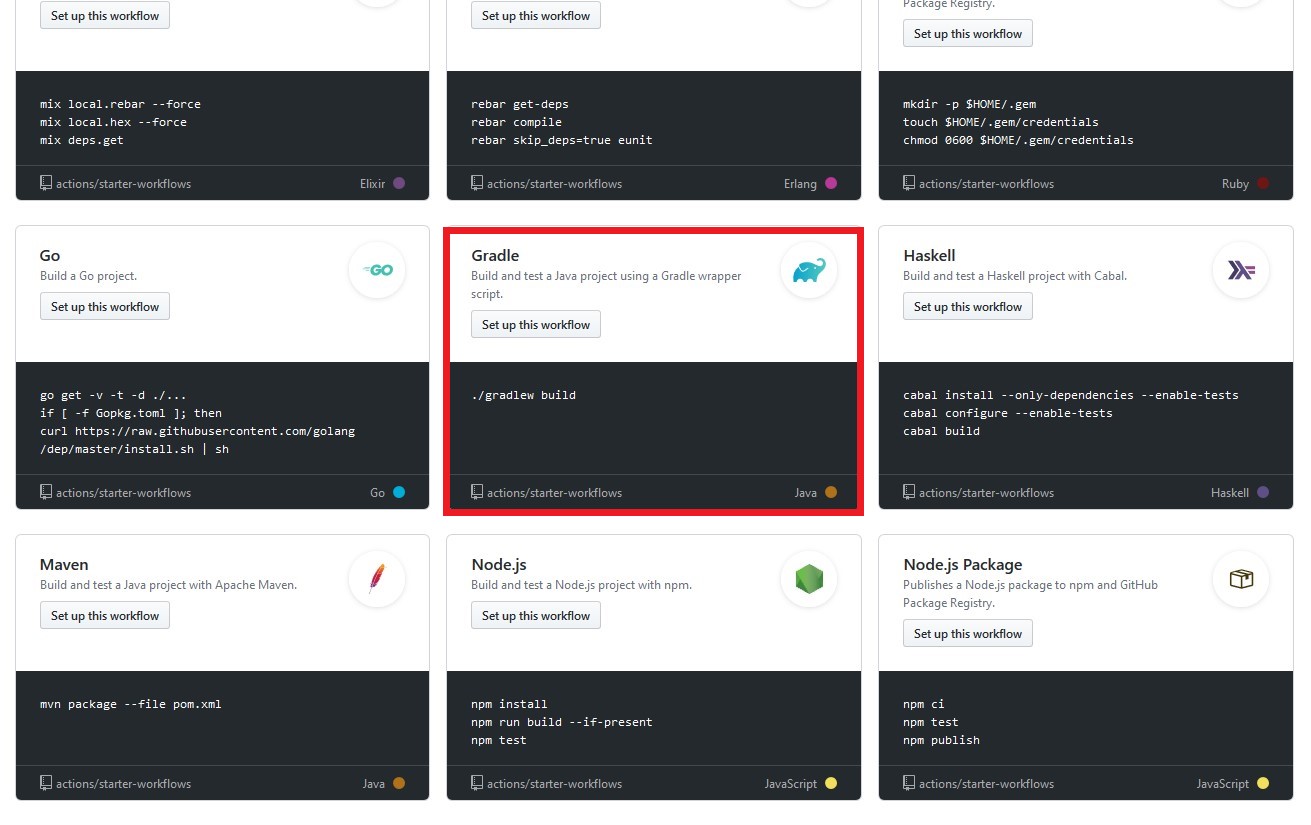
Here, I will select “Gradle” template from the drop down.
As soon as we select that option, a new window with the YAML file appears. This is my predefined workflow file that is created automatically based on the template that I selected.
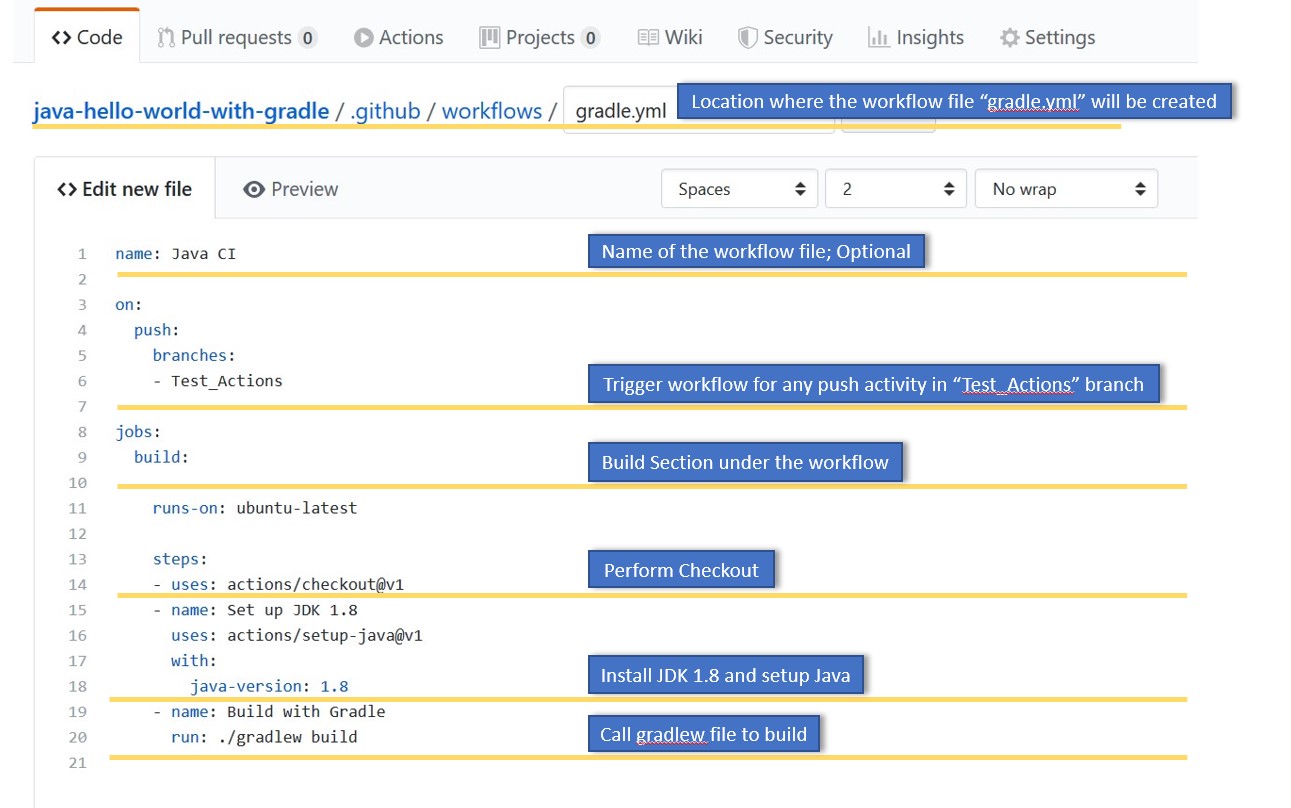
Configuring the workflow file
Since I only want to build the new branch “Test_Actions” that I have created, let me edit the YAML file accordingly. Let’s now look at what each line means in this workflow in the below image.
Let’s now commit the workflow file by clicking on “Start commit” Icon and clicking on “Commit new file” option after writing appropriate comments for the commit.

Here, I am committing this workflow file directly in the master branch which is a simple approach. There is also another option, wherein we can create a new branch and commit the file. We can then create a pull request later to merge it to the master branch once the build succeeds in that newly created branch.
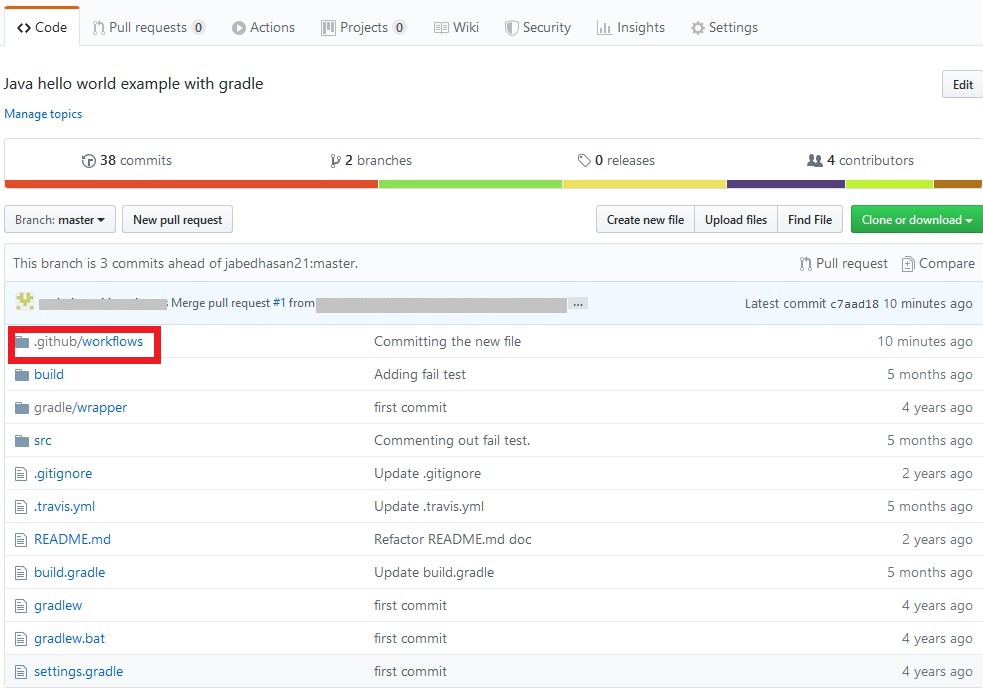
Now, as soon as the file is committed, we can see a new folder called “.github/workflows” have been created automatically inside which the gradle.yml file is present.
When we click on the “Actions” tab, we can see that the workflow has not yet run. This is because, there no push yet to the “Test_Actions” branch as specified in the workflow file.

Running the workflow file
Now, let’s run the workflow file. For this, let’s first create a new pull request and pull the changes from master to the “Test_Actions” branch.
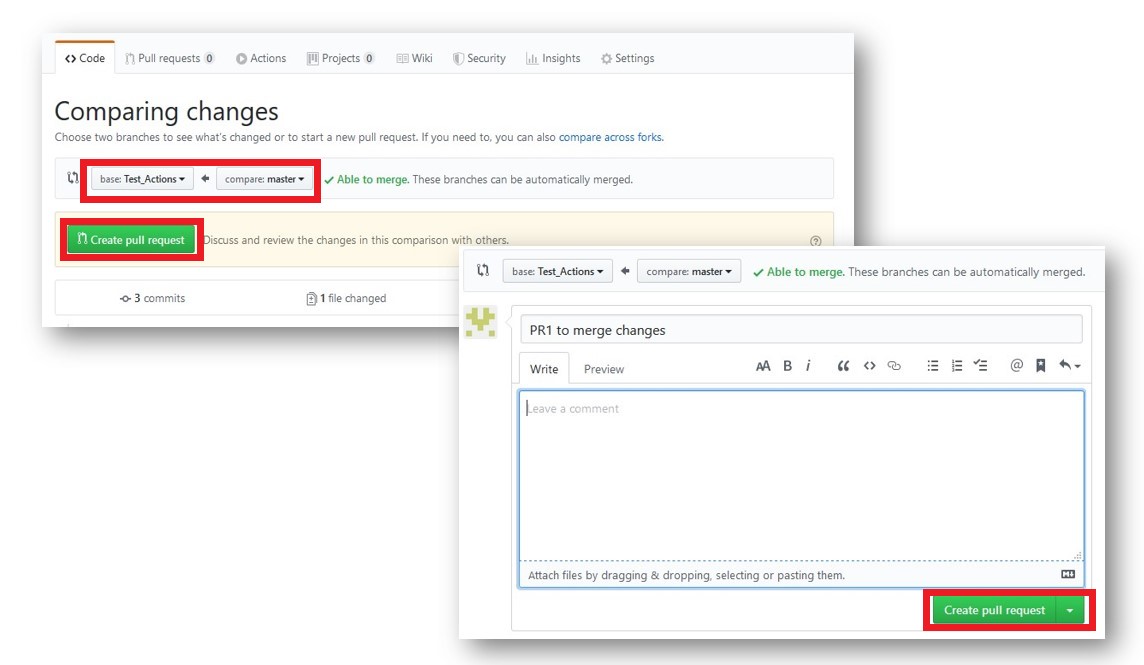
Now, let’s merge that changes to the “Test_Actions” branch.
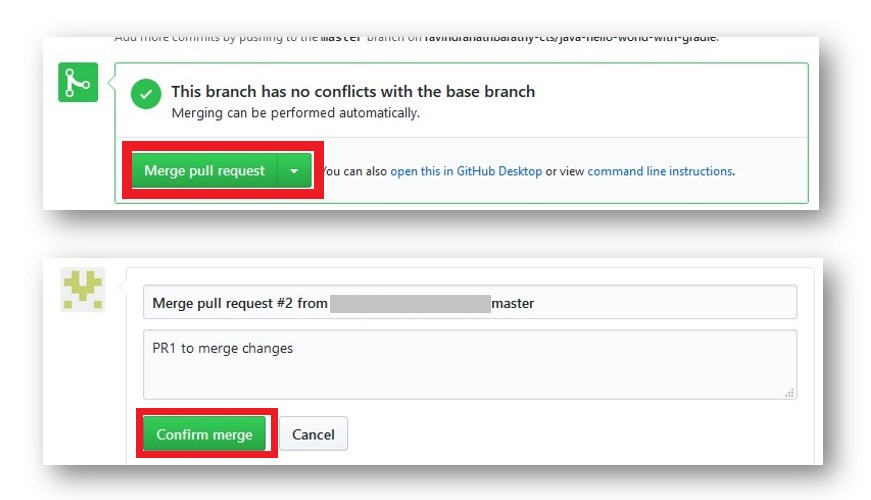
There we go! As soon as we pushed the changes to the “Test_Actions” branch, the workflow will be triggered.
When we click on the “Actions” tab now, we can see that the workflow has run here is successfully. We can edit the existing workflow file by clicking on “Edit workflow” option on the far right. We can also add a new workflow if required by selecting “Add a new workflow” option.

Below is the console output.
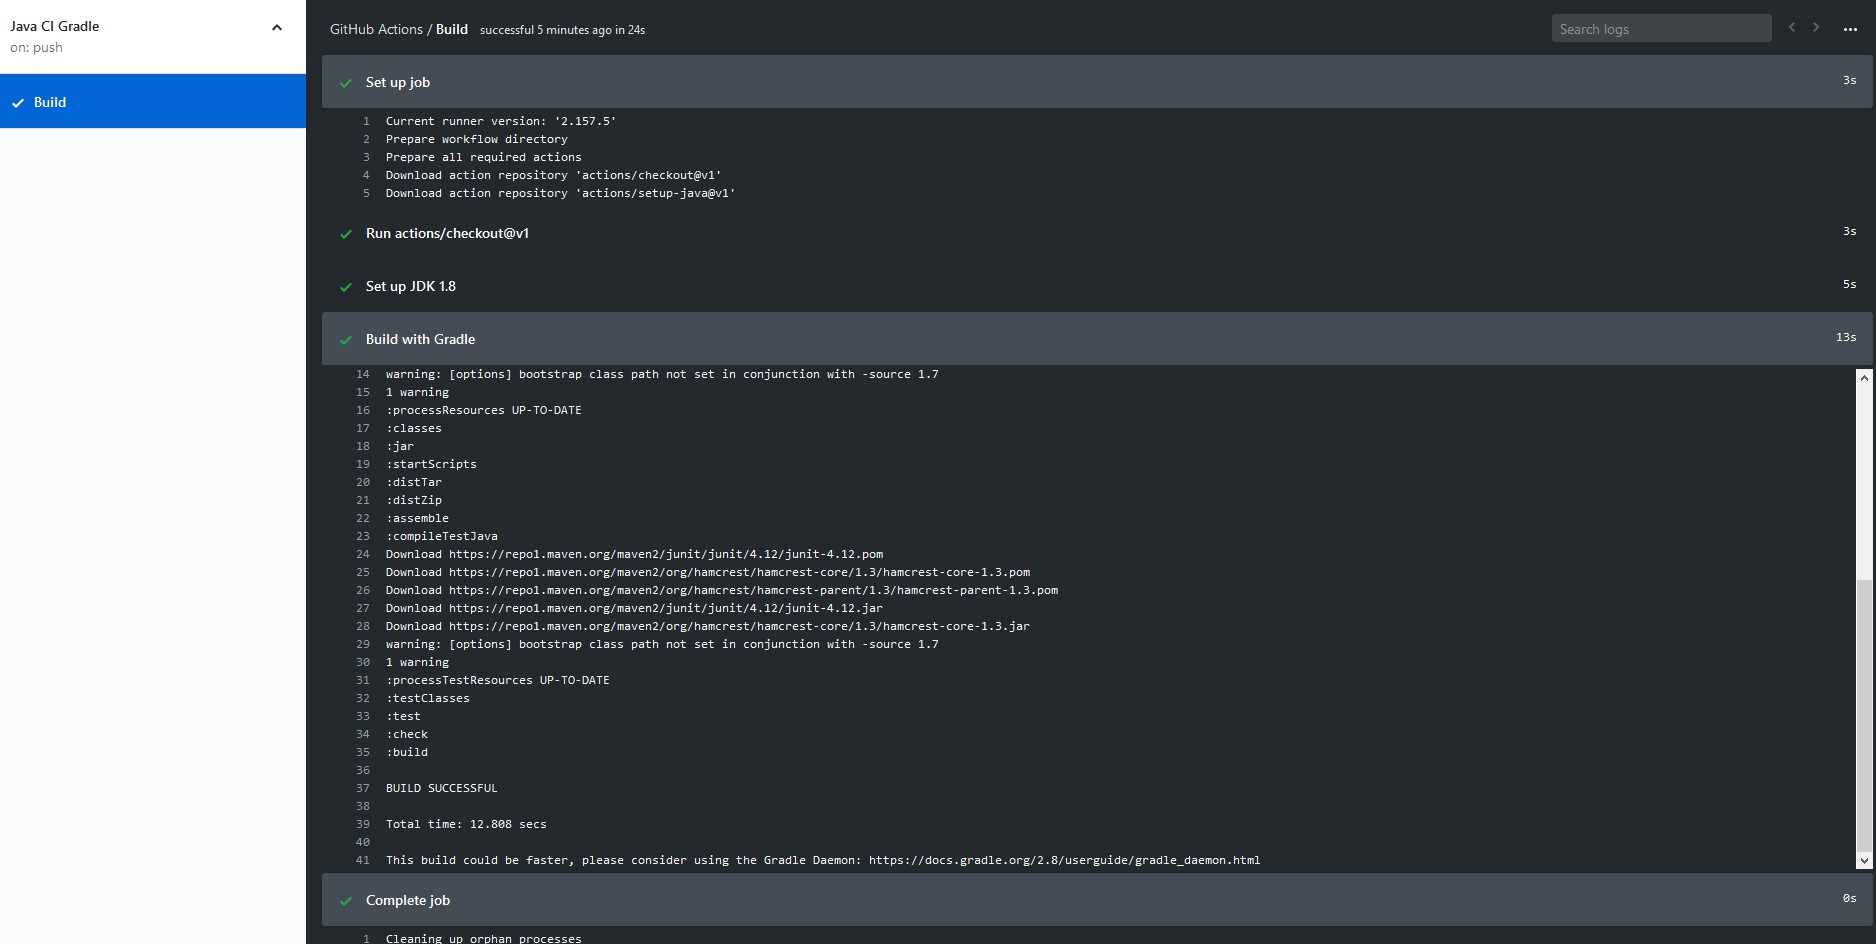
We can see separate logs for each step in the workflow along with the time it took to execute the step. We can click on each step to view the detailed logs. There is also an option to search logs, download logs and to view raw logs.
Conclusion
We have come to the end of this review article. I have to agree that it is so cool to develop, build and deploy at one place but will this be the future of automated software development life-cycle? Let’s wait and watch. You can find more information about GitHub Actions here. Also, note that GitHub Actions is currently in Beta version and have limited public usage. Please comment below and let us know if you feel GitHub Actions is a HIT or its too late since GITLAB CI is already becoming popular amongst users.
Please share your thoughts, questions, and suggestions in the comment section below and do subscribe to our blog to stay up to date on any new articles.