


Now that we have deployed our Kubernetes cluster using KOPS in our previous article, It’s time to deploy our very first application on it! In this article we will deploy a simple NodeJS Application on our Kubernetes cluster.
🙏 Before we see what we are going to learn today. Please like our Facebook page and follow us on twitter by using the links on the top right corner of this page! 🙏
Here is what we are are going to learn as part of this article.
- About our NodeJS app
- Architecture of our Application
- Accessing the Kubernetes Dashboard
- Deploying the node Application
- Conclusion
About our NodeJS app
For this exercise we will be using a simple NodeJS application in the front end and a MongoDB as the database. We will not be going through the development of the application as there are excellent articles all over the internet. We will be using /node-todo which is an awesome open-source NodeJS project which is very simple to build and deploy.
✴️Shoutout to the developers who has developed this app and open-sourced it so that the developer community grow their knowledge on NodeJS ✴️
I highly recommend you checkout their GITHUB Organization and explore other projects they have out there.
Note: The application is not containerized out of the box, I forked the application under my own organization and went through dockerizing the application. We will not be covering that process in this article, perhaps thats for some other article. Here is the forked application which is also containerized under my organization, /node-todo.
Architecture of our Application
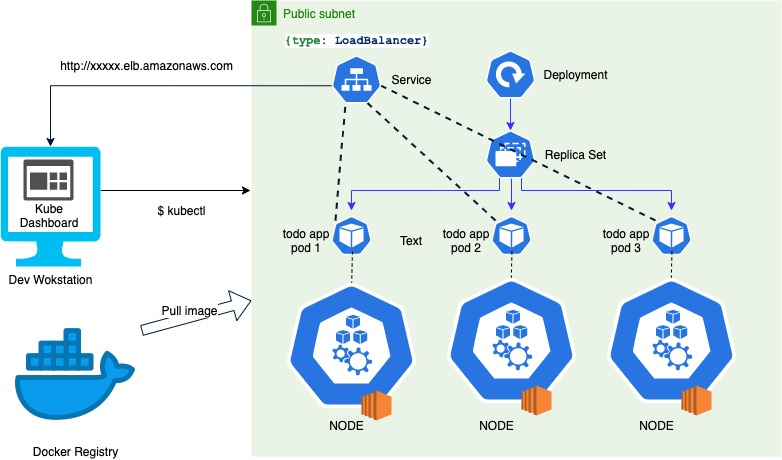
Now that we have seen what our application is, we will now look at how the deployment architecture of our application looks like. The following diagram gives a high-level picture of different components of our application once its deployed on Kubernetes.
We will see what each and every component in a short write up below. These are in no way an exhaustive material to understand the different components of a Kubernetes deployment. There are very good reading material out there on the official Kubernetes website that can used for training purposes, I will provide links for each of the components so that you can gain more knowledge on them.
Components of a Kubernetes Deployment
Kubernetes Nodes:
Kubernetes nodes or worker nodes are simply the virtual machines we created on AWS to run our PODs. These are the nodes where the actual application containers would be running within PODs. You can read more of Kubernetes Nodes here!
Kubernetes Deployment:
Deployments in Kubernetes are constructs that manage the configurations for the PODs and ReplicaSets. What that means is we can define how our application should look in a deployed state and the Deployment ensures that state is created and maintained. We can deploy highly available application out of the box using the Deployment feature in Kubernetes. Read more about it here!
PODs:
PODs are your deployed application service or micro-service. A POD can contain one or more tightly coupled containers. From an application point of view a POD is a single host running it. In our example, our POD consists of our NodeJs app running in a docker container. Usually more than one POD is deployed for high-availability and load sharing. Read more about PODs here!
ReplicaSets:
ReplicaSets as the name suggests ensures that a certain number PODs are always running and healthy as defined in a Deployment. The ReplicaSets is essential part of the high-availability function of the Kubernetes Deployment as it always ensures the quality of service for a given application deployed on Kubernetes. Read more about ReplicaSets here!
Service:
A Service exposes your running PODs to the consuming apps or to the actual users. The Service identifies the running PODs by the unique IP addresses that Kubernetes assigns very running POD. The Service also load-balances the incoming traffic amongst the PODs running under it. I highly recommend you to read about the different types of Services that Kubernetes has here!
Accessing the Kubernetes Dashboard
Now that we have covered the boring theoretical part of Kubernetes, it’s time to get our hands dirty with some Kubernetes hand-on awesomeness!
Let’s start by setting up the Kubernetes dashboard, which is a web-based interface which gives an overview of applications running on our cluster. In fact the Kubernetes dashboard itself is an containerized application deployed on Kubernetes. You can check on how to deploy the kubernetes dashboard in our article here!
Creating a generic user for RBAC
We we pick up right where we left off in the previous article, we will go ahead and access the dashboard using a generic user token.
Get yourself familiarized with yaml notations as in Kubernetes all resources are defined as yaml. Here is the definition for creating a service user.
apiVersion: v1
kind: ServiceAccount
metadata:
  name: admin-user
  namespace: kubernetes-dashboard
Save the above file as admin-user.yml on your workspace and apply the changes to Kubernetes using the following command.
kubectl apply -f admin-user.yml
Now that the user is created, lets assign the cluster-admin role to the created service user. Here is the definition for the user, we will name it as admin-user-role.yml.
apiVersion: rbac.authorization.k8s.io/v1
kind: ClusterRoleBinding
metadata:
  name: admin-user
roleRef:
  apiGroup: rbac.authorization.k8s.io
  kind: ClusterRole
  name: cluster-admin
subjects:
- kind: ServiceAccount
  name: admin-user
  namespace: kubernetes-dashboard
Apply the role to the user using the following command,
kubectl apply -f admin-user-role.yml
Since the user has been added and the role has been applied, it’s time to get the user token using the following command,
kubectl -n kubernetes-dashboard describe secret $(kubectl -n kubernetes-dashboard get secret | grep admin-user | awk '{print $1}')
Here is an output for the user we created,

Accessing the dashboard using the generic user token
Let’s put the token in the Kubernetes Dashboard to get access to it!
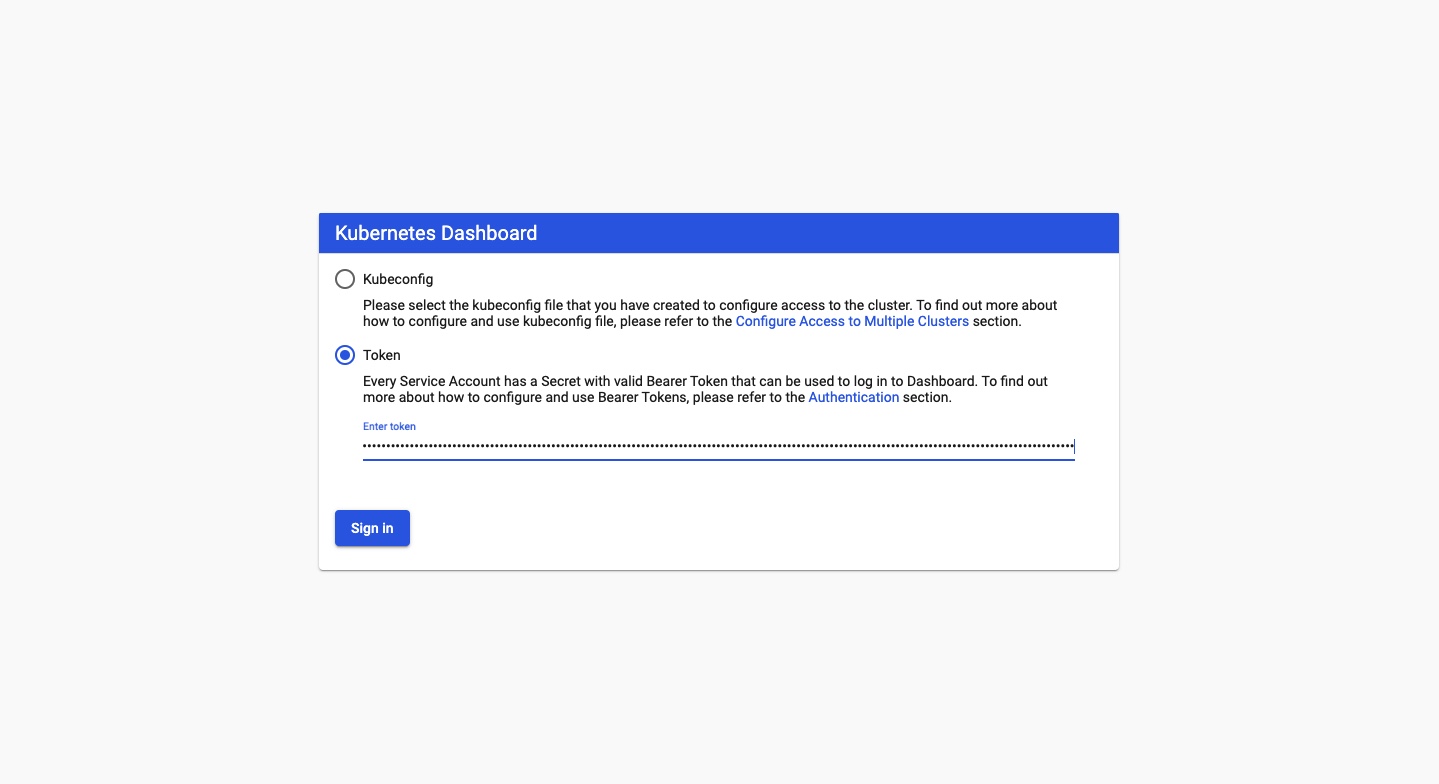
Click “Sign in”
Awesome! Now that we have full visibility into whats there and whats running on our cluster, lets go ahead and deploy our NodeJs App on it!
Deploying the node Application
As previously mentioned, our application needs a MongoDB instance for storing storing and retrieving persistent data. We will provision a cloud MongoDB instance using the mongodb cloud service. The free trial should be enough for our POC needs.
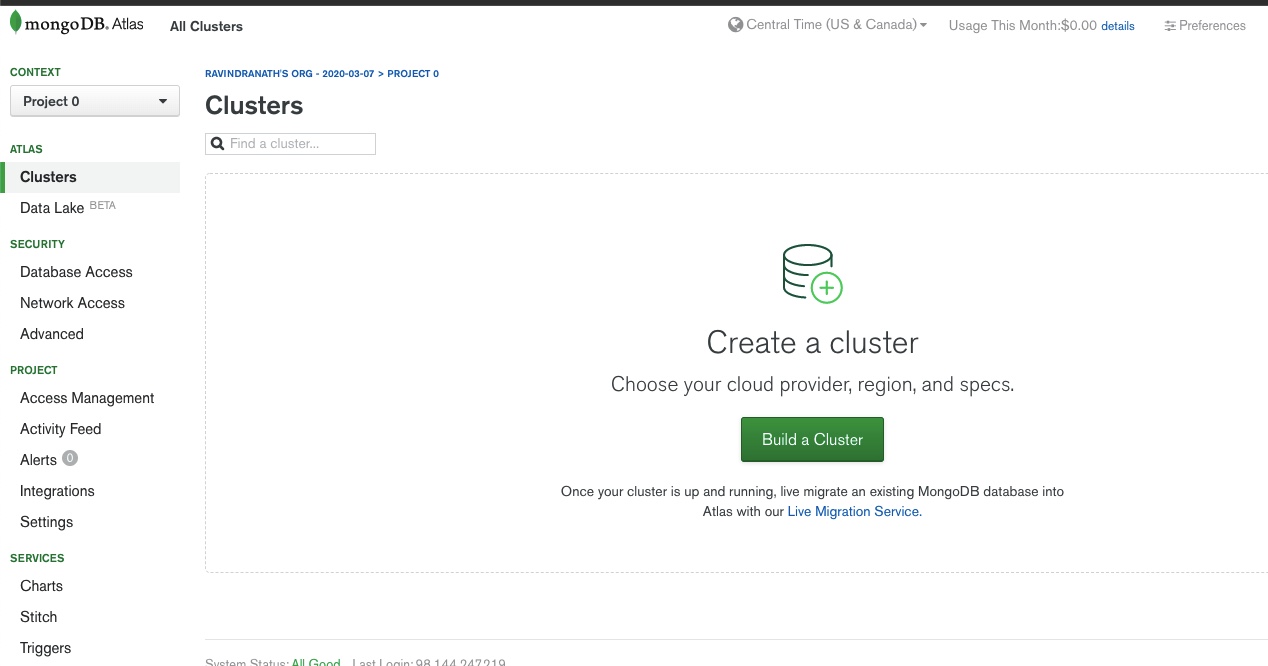
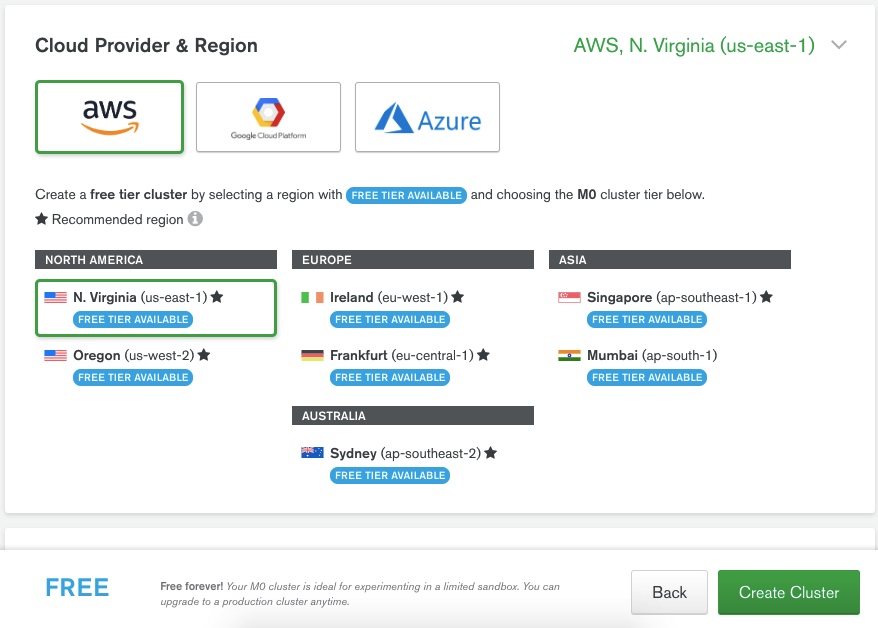
Creating a MongoDB instance
The following screenshots walks through the process of creating a simple free “Starter Cluster” of the MongoDB cloud instance.

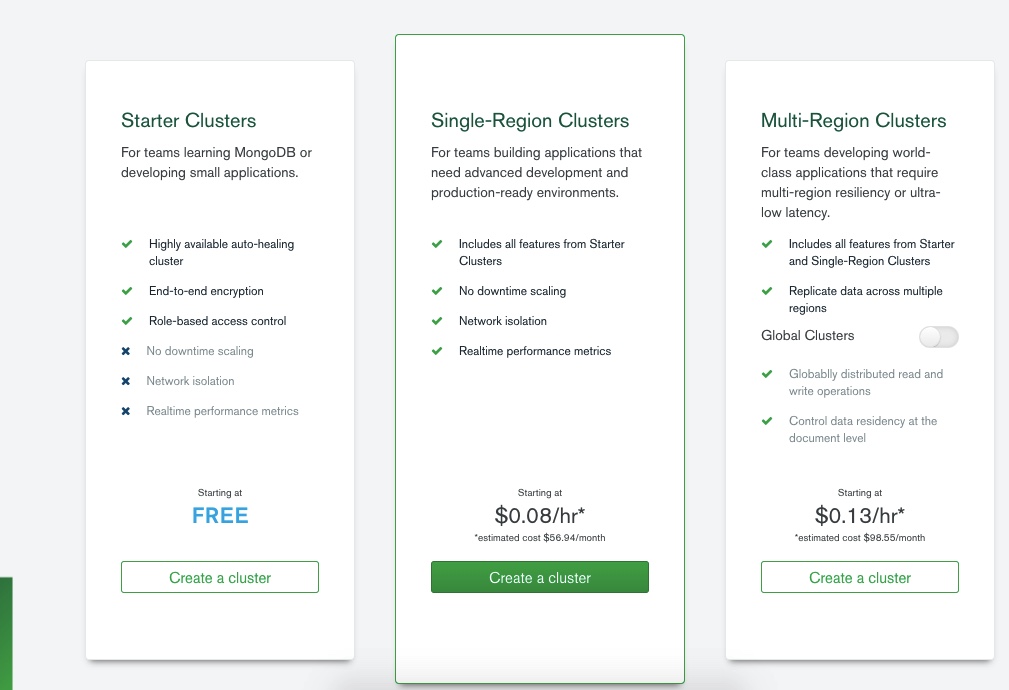
Let’s select AWS as our provider.
Let’s wait till our cluster gets built!
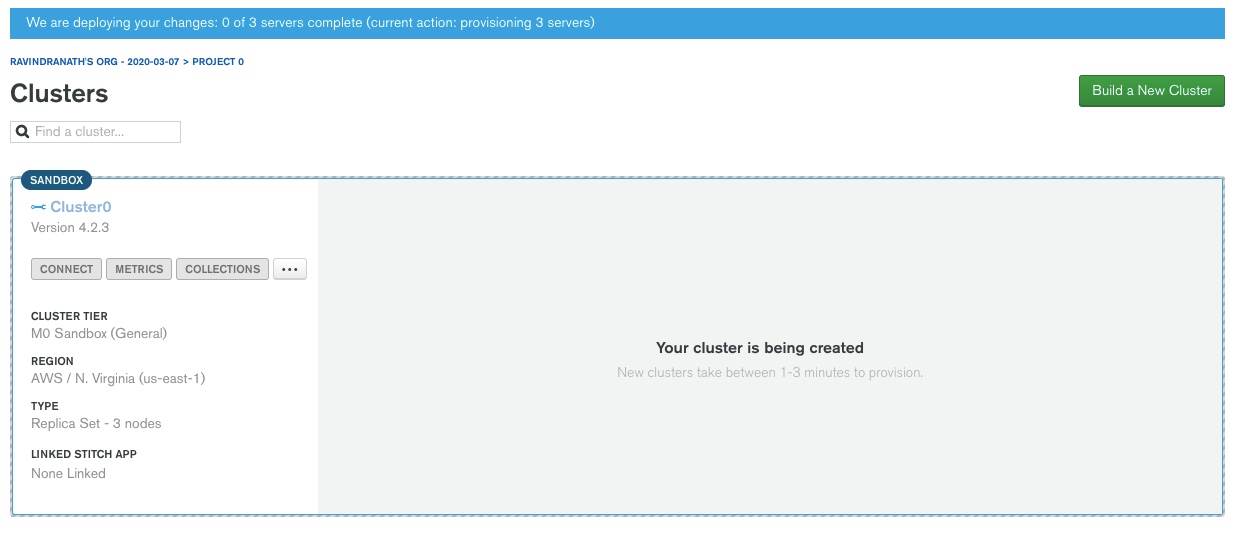
There you go, our cluster is up and running.

Now we create a user for our NodeJS app to connect to our DB.

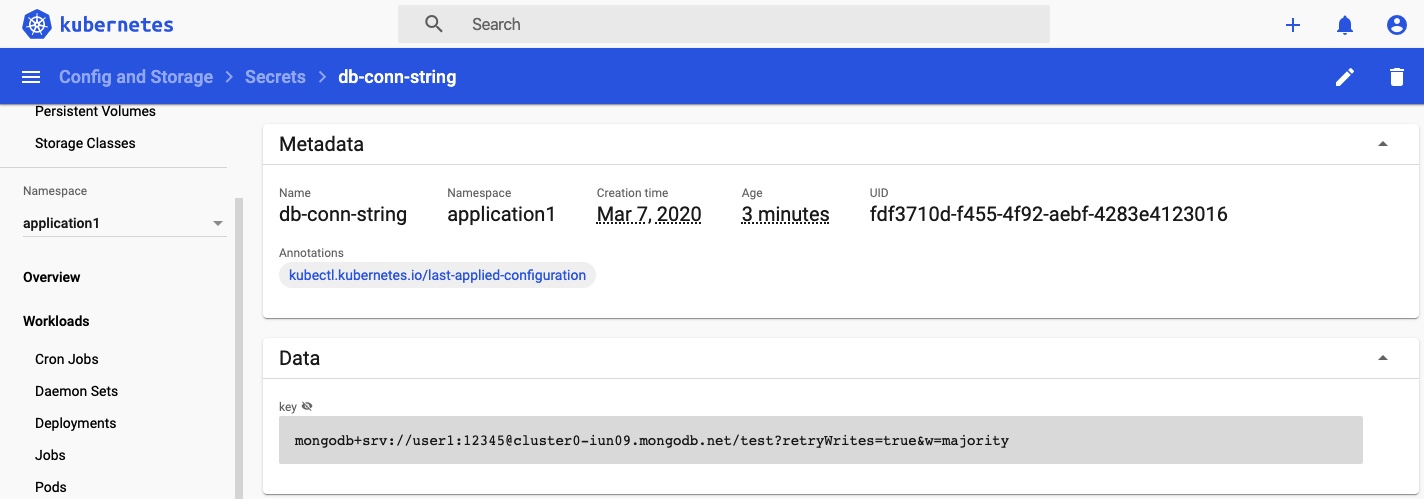
Creating a secret in Kubernetes
Our MongoDB is not ready to connect. The connection string to that our app will be using to connect the mongoDB will include the username and password. It’s not best practice to store this connection string as clear text in our application. Kubernetes has a secret store with which we can store and retrieve sensitive configurations needed by our application.
We will start by creating a namespace in Kubernetes, the namespaces provides a logical isolation on the cluster for applications to live amongst large organizations. The secrets in one namspace also cannot be accessed by applications from a different namespace. This could be some added advantage when running multiple applications on the same cluster.
Here is the command to create a namespace called application1.
kubectl create namespace application1
We can base64 encode our connection string which will provide some added obfuscation. Here is what our secret definition looks like,
apiVersion: v1
kind: Secret
metadata:
  name: db-conn-string
data:
  key: |
    bW9uZ29kYitzcnY6Ly91c2VyMToxMjM0NUBjbHVzdGVyMC1pdW4wOS5tb25nb2RiLm5ldC90ZXN0P3JldHJ5V3JpdGVzPXRydWUmdz1tYWpvcml0eQo=
The following command can be used to create the secret under the namespace we just created,
kubectl apply -n application1 -f secret.yml
where the -n flag is for namespace.
Let’s use the Kubernetes Dashboard for viewing our secret that we created,
Now that our configurations are deployed, Let’s look at our application kubernetes.yml
Deploying the Application
Here is what our application kubernetes.yml looks like,
apiVersion: apps/v1
kind: Deployment
metadata:
  name: todo
spec:
  replicas: 3 # 3 PODs at any given point of time
  selector:
    matchLabels:
      app: todo
  template:
    metadata:
      labels:
        app: todo
    spec:
      containers:
        - name: todo
          image: codebabel/todo # Docker container with our node app
          ports:
            - containerPort: 8080
          env:
          - name: DB_CONN_STRING
            valueFrom:
              secretKeyRef:
                name: db-conn-string # This where we are referencing the secret created from the previous step
                key: key

---
apiVersion: v1
kind: Service
metadata:
  name: todo-service
  labels:
    name: todo-service
spec:
  ports:
    - port: 80 # The service will publish the application on the default http port(80)
      targetPort: 8080
      protocol: TCP
  selector:
    app: todo
  type: LoadBalancer # Type loadbalancer will use the underlying cloud provider to create an external url for accessing the app
Let’s take a closer look at our kubernetes.yml file. It’s broadly divided in 2 sections, the deployment and the service.
The deployment hold the configurations for, the replicaset and the pods. The replicaset will spin up and maintain 3 PODs at all times. The POD description contains the docker container details where the nodejs app has been built and published at.
Let’s look at the service definition. The service type loadbalancer will expose the Service externally using a cloud provider’s load balancer in this case AWS. This basically means that we will get an AWS ELB url to access our node app.
The application can be deployed using kubectl apply command just like we created secret in the previous step. Lets look at the Kubernetes dashboard for our deployed application.
We can see the Deployment and the corresponding PODs below,


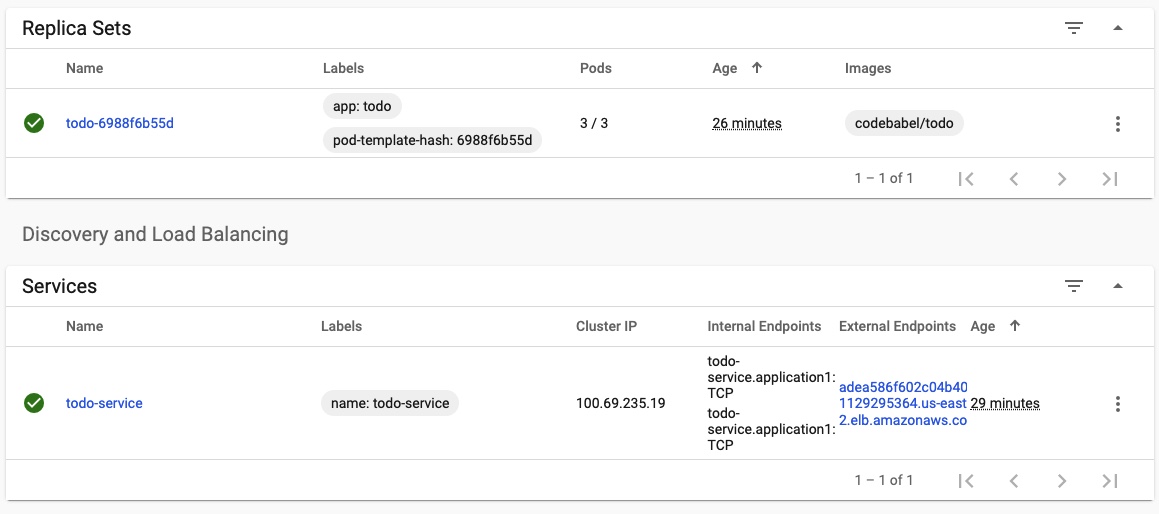
Now that our App is up and running lets hit the external endpoints created for the service and launch the app!
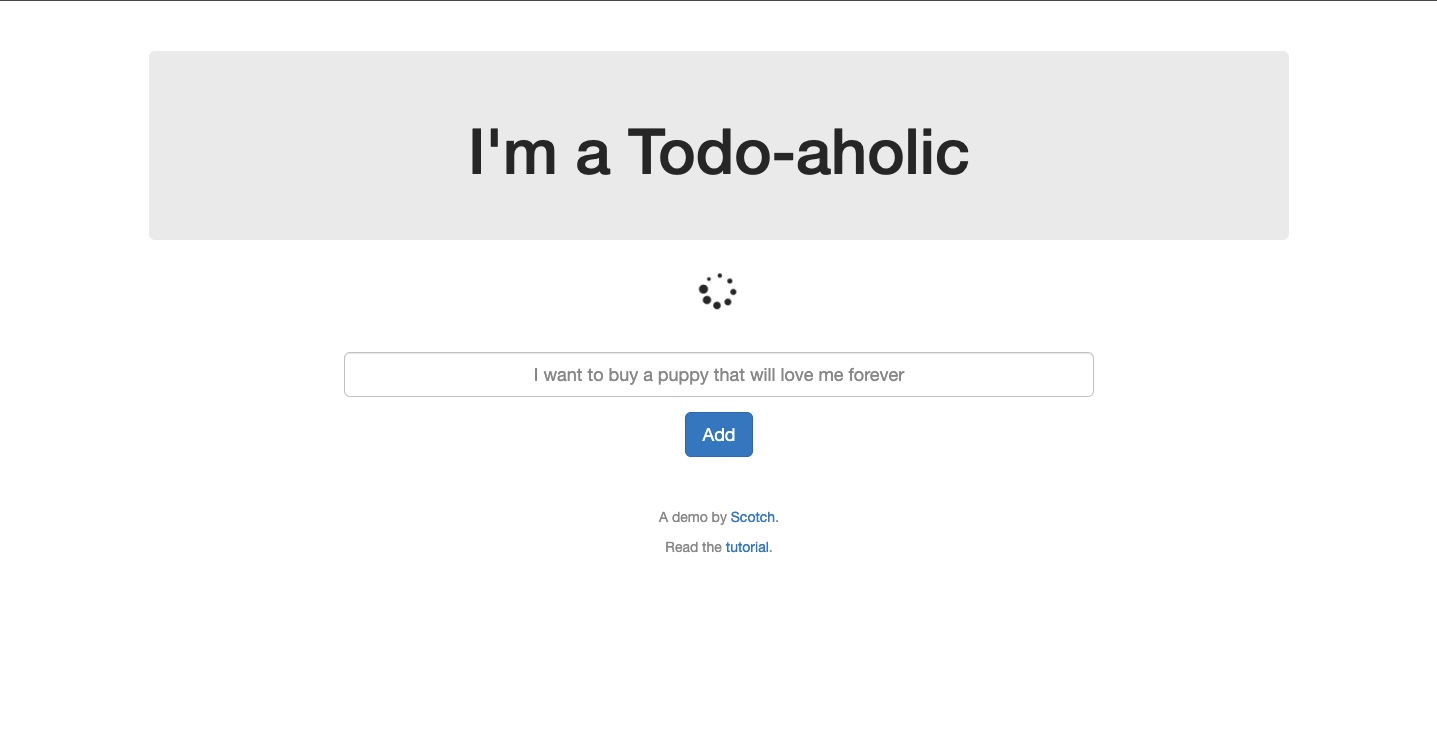
There it is! Our app in its full glory! But, wait a min, why do we see the loading icon above our text box?? That doesn’t look right. At this point we are seeing that our POD is healthy however there is some application error which is causing this error. Lets go ahead and troubleshoot this by looking at the POD logs.
We can check that just by clicking the individual POD and selecting view logs from the top right corner.

Based on validating the logs, it looks like our App is unable to connect to the mongoDB instance. Lets go ahead check if there is any configuration we can change under our MongoDB cloud instance.
Looks like we didn’t not whitelist the incoming connections to our mongoDB instance. An amateur mistake indeed! I fixed it by just whitelisting everything for now.
⚠️🛑 Caution here! Ideally we should only be whitelisting our subnet CIDR ranges which will only allow connections from the Kubernetes cluster. I can get away with this as this just for demonstration purposes. However, this is not how it must be implemented in any Production or even testing regions ⚠️🛑
Now lets re-deploy our app and check the logs again.

That looks clean. Let’s launch our application and check if that works as expected.
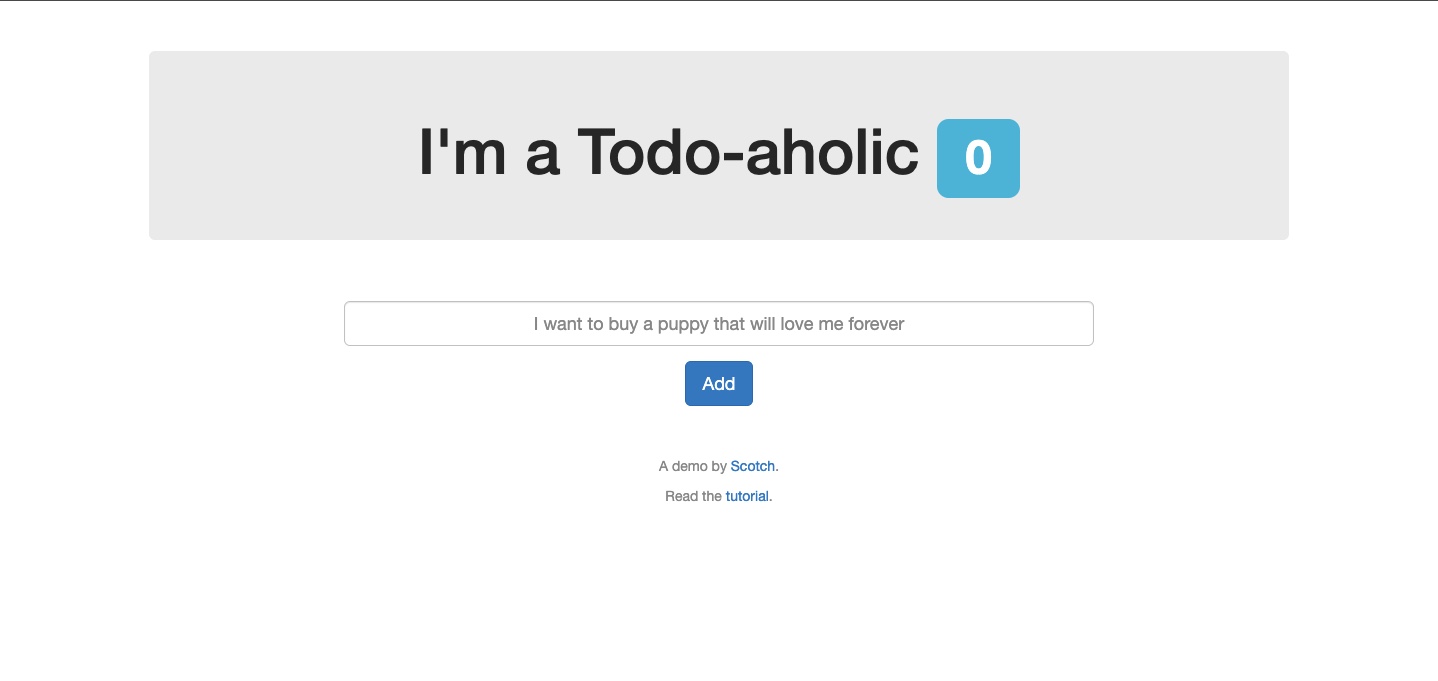
No loading icon anymore! Lets add some TO-DO items in our TODO-aholic app!

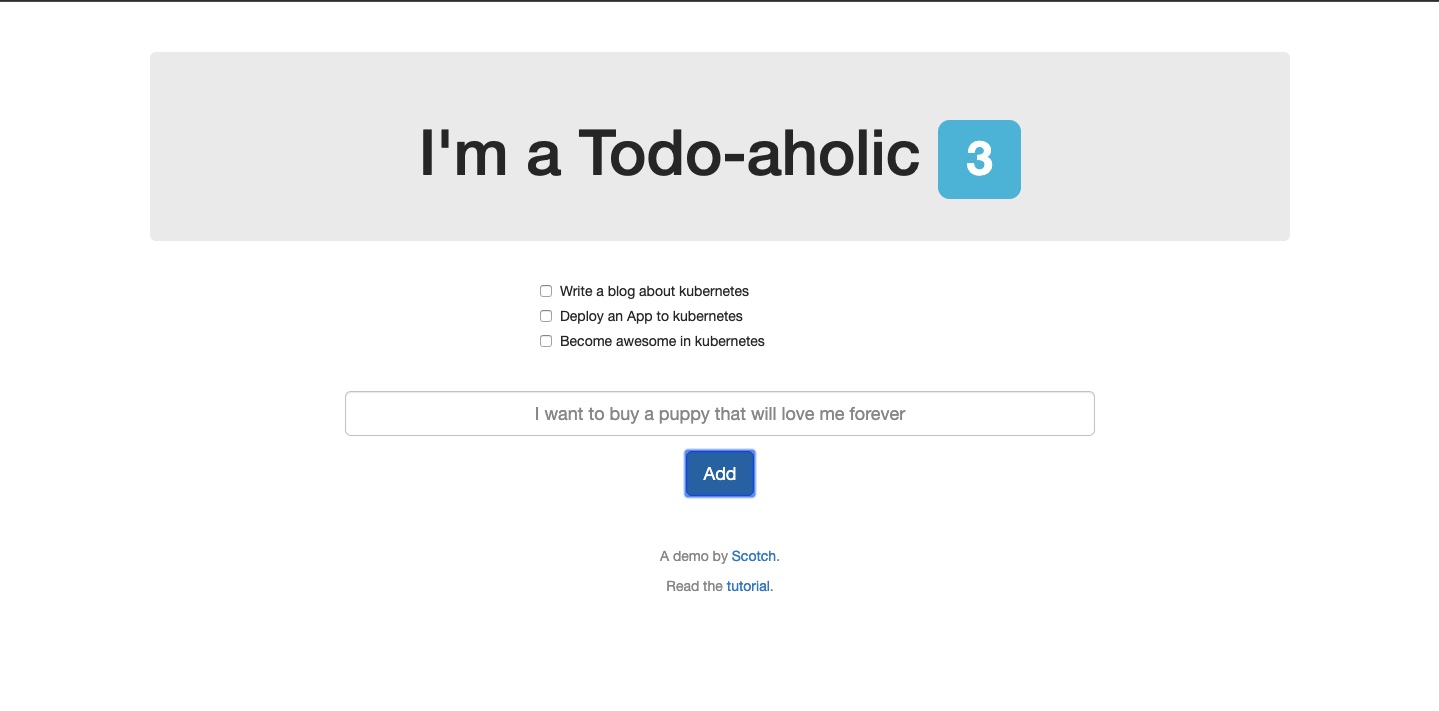
Great! Now the App has been successfully tested after deploying to kubernetes.
Conclusion
If you made it till point, you deserve a pat on your back. This was a long article, probably the longest one in our blog. However, Kubenetes is a fascinating “thing”. With this long article we have barely scratched the surface of different things it’s capable of. We did cover a lot of theory in this article which will help newbies grasp some of the basic concepts of Kubernetes.
The most fascinating according to me is, even though we deployed the NodeJS application using a simplified deployment descriptor file using a single kubectl file. Kubernetes provides health check, high-availability, redundancy, security etc. right out of the box. And most these things remains under the hood so that a new user doesn’t have to worry about them and just get started and just focus more on application development. As always let me encourage your to get your hands dirty by trying out this yourself on your workspace.
Please share your thoughts, questions, and suggestions in the comment section below. Do subscribe to our blog to stay up to date on any new articles.