

Welcome back to the second article in our #BacktoBasics series. As many of us already know, SonarQube is an open-source tool for continuous inspection of code quality. It performs static analysis of code, thus detecting bugs, code smells and security vulnerabilities. In addition, it also can report on the duplicate code, unit tests, code coverage and code complexities for multiple programming languages. Hence, in order to achieve Continuous Integration with fully automated code analysis, it is important to integrate SonarQube with CI tools such as Jenkins. Here, we are going to discuss integrating SonarQube with Jenkins to perform code analysis.
Below are the things we will discuss in this article:
- Running Jenkins and SonarQube on Docker
- Configuring Jenkins for SonarQube Analysis
- Creating and Configuring Jenkins Pipeline Job
- Building the Jenkins Pipeline Job
- Conclusion
Running Jenkins and SonarQube on Docker
Enough on the introductions. Let’s jump into the configurations, shall we? First of all, let’s spin up Jenkins and SonarQube using Docker containers. Note that, we are going to use docker compose as it is an easy method to handle multiple services. Below is the content of the docker-compose.yml file which we are going to use.
version: '3'
services:
  sonarqube:
    ports:
      - '9000:9000'
    volumes:
      - 'E:\work\sonar\conf\:/opt/sonarqube/conf'
      - 'E:\work\sonar\data\:/opt/sonarqube/data'
      - 'E:\work\sonar\logs\:/opt/sonarqube/logs'
      - 'E:\work\sonar\extensions\:/opt/sonarqube/extensions'
    image: sonarqube
  jenkins:
    image: 'ravindranathbarathy/jenkins'
    volumes:
      - /var/run/docker.sock:/var/run/docker.sock
      - 'E:\work\jenkins_home\:/var/jenkins_home'
    ports:
      - '8080:8080'
      - '5000:50000'
  jenkins-slave:
    container_name: jenkins-slave
    restart: always
    environment:
            - 'JENKINS_URL=http://jenkins:8080'
    image: kaviyakulothungan/jenkins-slave-node:v2
    volumes:
      - /var/run/docker.sock:/var/run/docker.sock
      - 'E:\work\jenkins_slave\:/home/jenkins'
    depends_on:
      - jenkins
docker-compose up is the command to run the docker-compose.yml file.
docker-compose up
Note: The `docker-compose` command must be run from folder where the `docker-compose.yml` file is placed
This file, when run, will automatically host the Jenkins listening on port 8080 along with a slave.
The SonarQube will be hosted listening on port 9000.
Configuring Jenkins for SonarQube Analysis
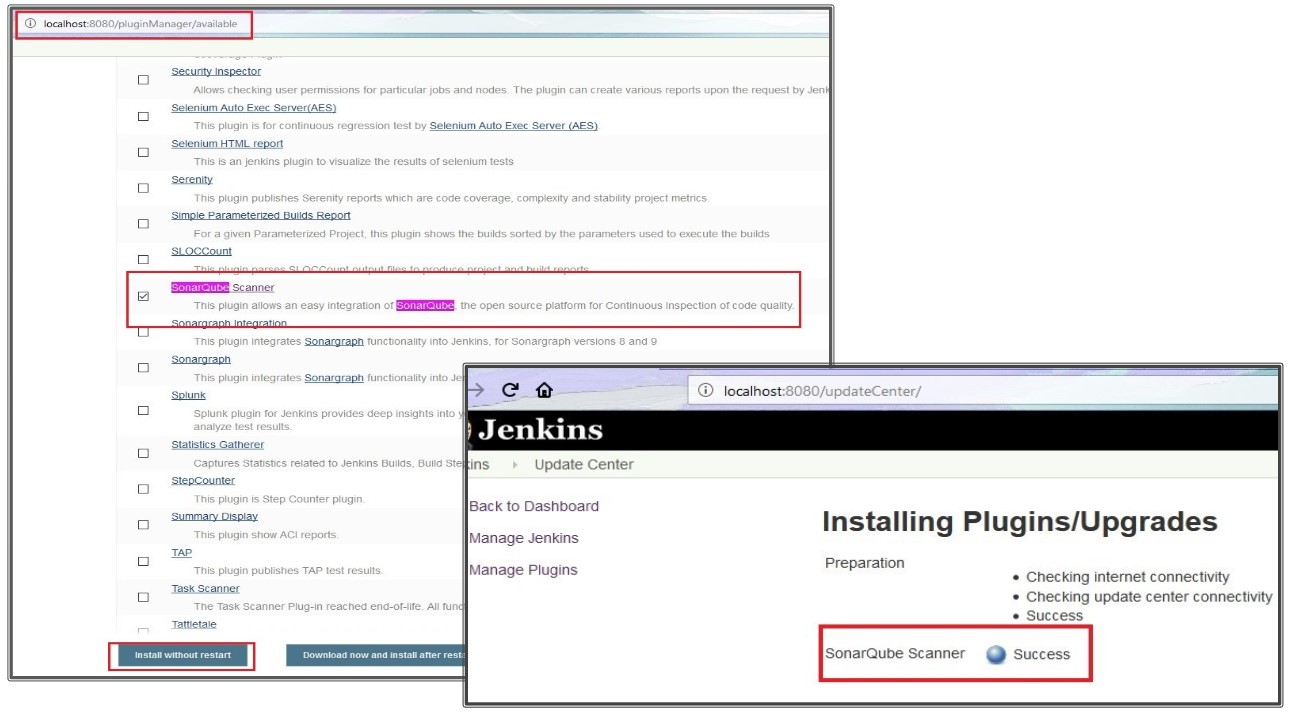
In order to run the SonarQube analysis in Jenkins, there are few things we have to take care before creating the Jenkins job. First of all, we need to install the ‘SonarQube Scanner” plugin. For this, let’s go to Jenkins -> Manage Jenkins -> Manage Plugins. There, navigate to “Available” view and look for the plugin “SonarQube Scanner”. Select the plugin and click on “Install without restart” and wait for the plugin to be installed.
Once the plugin is installed, we need to configure a few things in the Jenkins global configuration page.
For that, let’s click on Jenkins -> Manage Jenkins -> Configure System -> SonarQube Servers and fill in the required details.
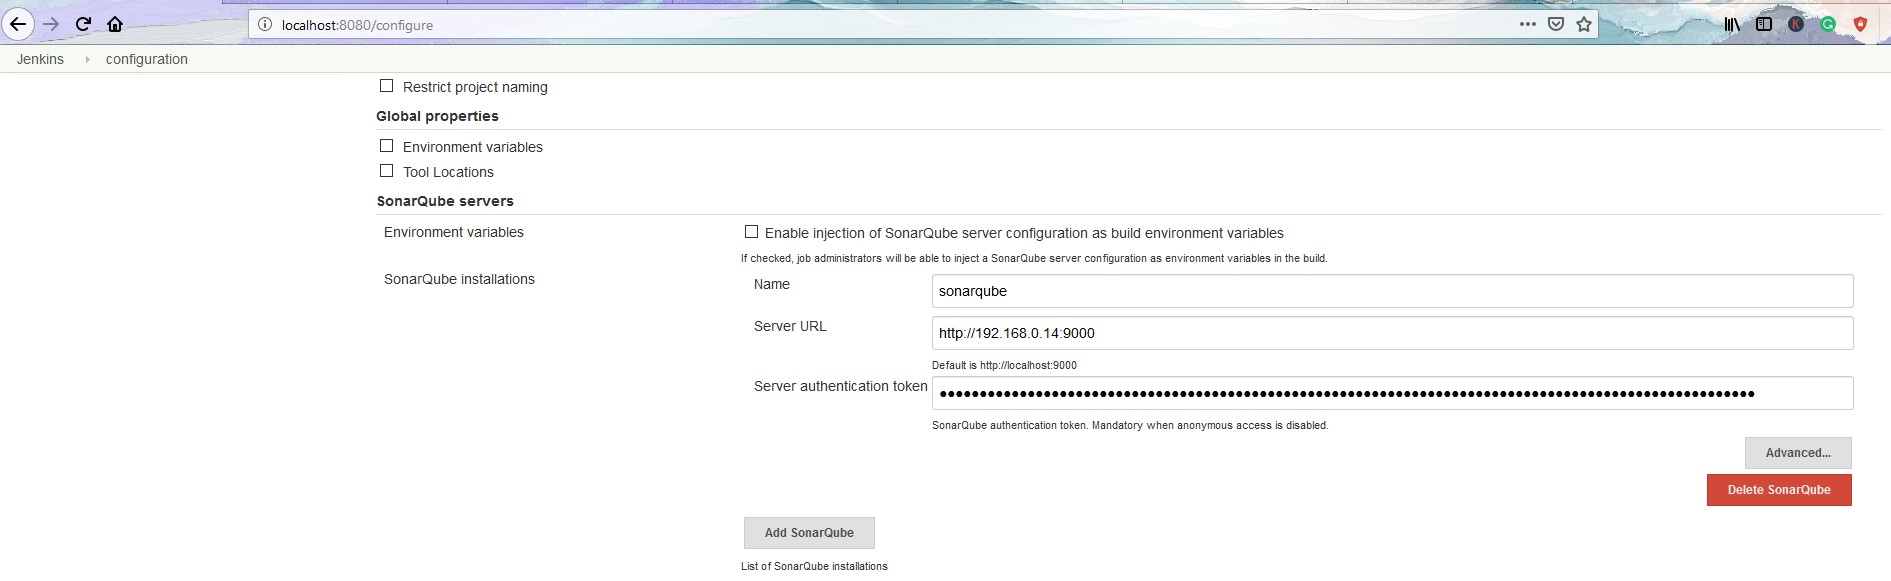
Here,
- Name: Anything meaningful. Eg. sonarqube
- Server URL: <your sonarqube server url>
- Server Authentication Token: Refer below
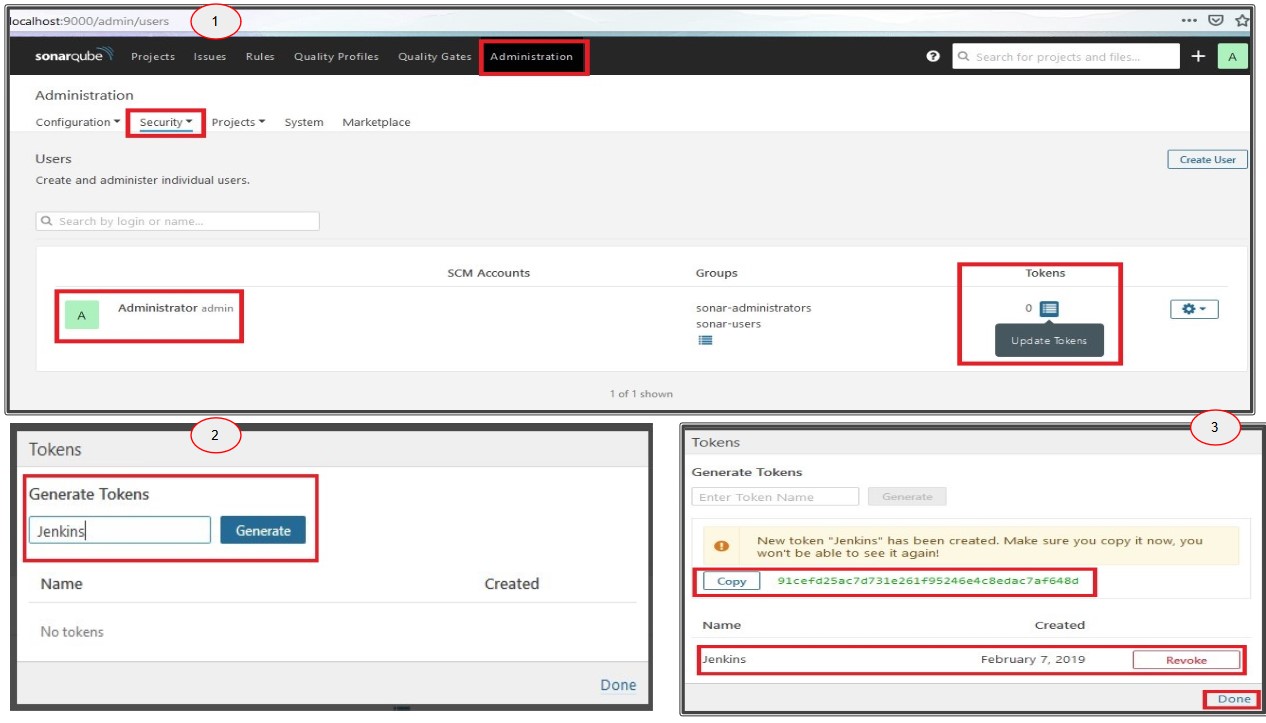
To get the server authentication token, login to SonarQube and go to Administration -> Security -> Users and then click on Tokens. There, Enter a Token name and click on Generate and copy the token value and paste it in the Jenkins field and then click on “Done”.
Finally, save the Jenkins Global configurations by clicking on the “Save” icon.
There is one last configuration which has to be set up. In order to run SonarQube scan for our project, we need to install and configure the SonarQube scanner in our Jenkins. For that, let’s go to Manage Jenkins -> Global Tool Configuration -> SonarQube Scanner -> SonarQube Scanner installations. Enter any meaningful name under the Name field and select an appropriate method in which you want to install this tool in Jenkins. Here, we are going to select “Install automatically” option. Then, click on “Save”.

Creating and Configuring Jenkins Pipeline Job
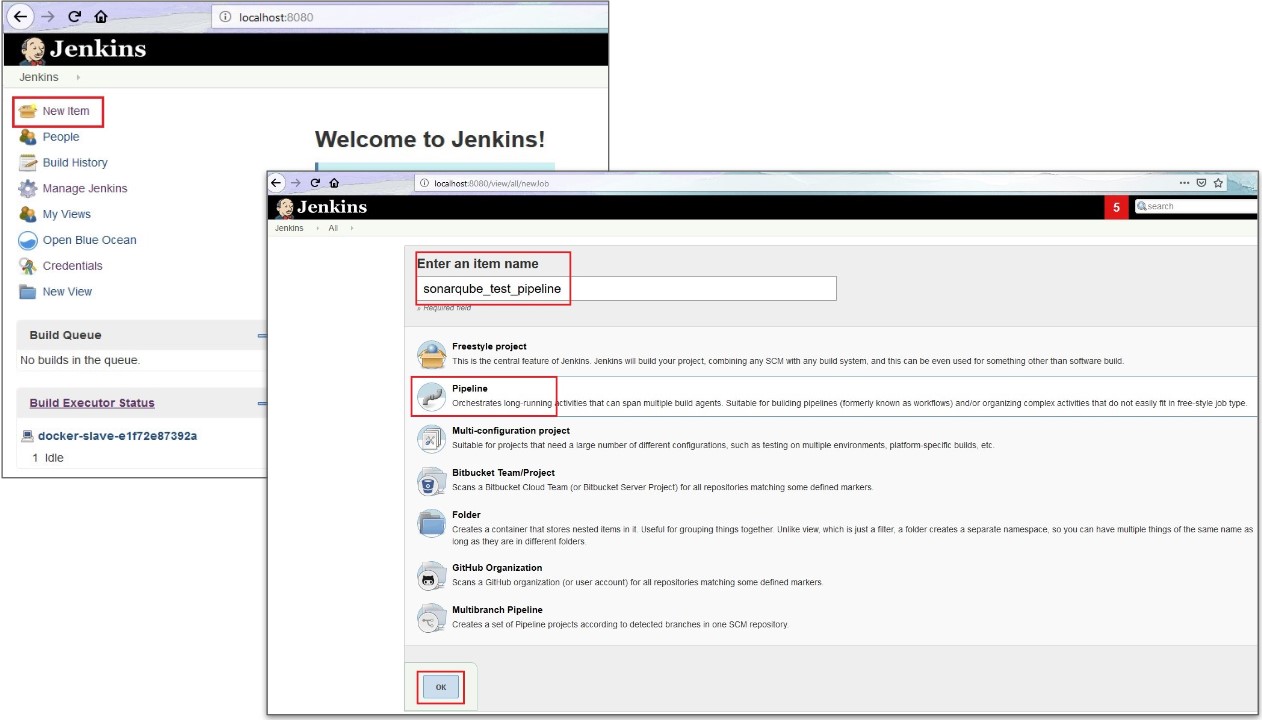
Since we are all set with the global configurations, let’s now create a Jenkins Pipeline Job for a simple node.js application for which code analysis will be done by SonarQube.
For that, let’s click on “New Item” in Jenkins home page and enter the job name as “sonarqube_test_pipeline” and then select the “Pipeline” option and then click on “OK”.
Now, inside the job configuration, let’s go to the Pipeline step and select Pipeline Script from SCM and then select Git and enter the Repository URL and then save the job.
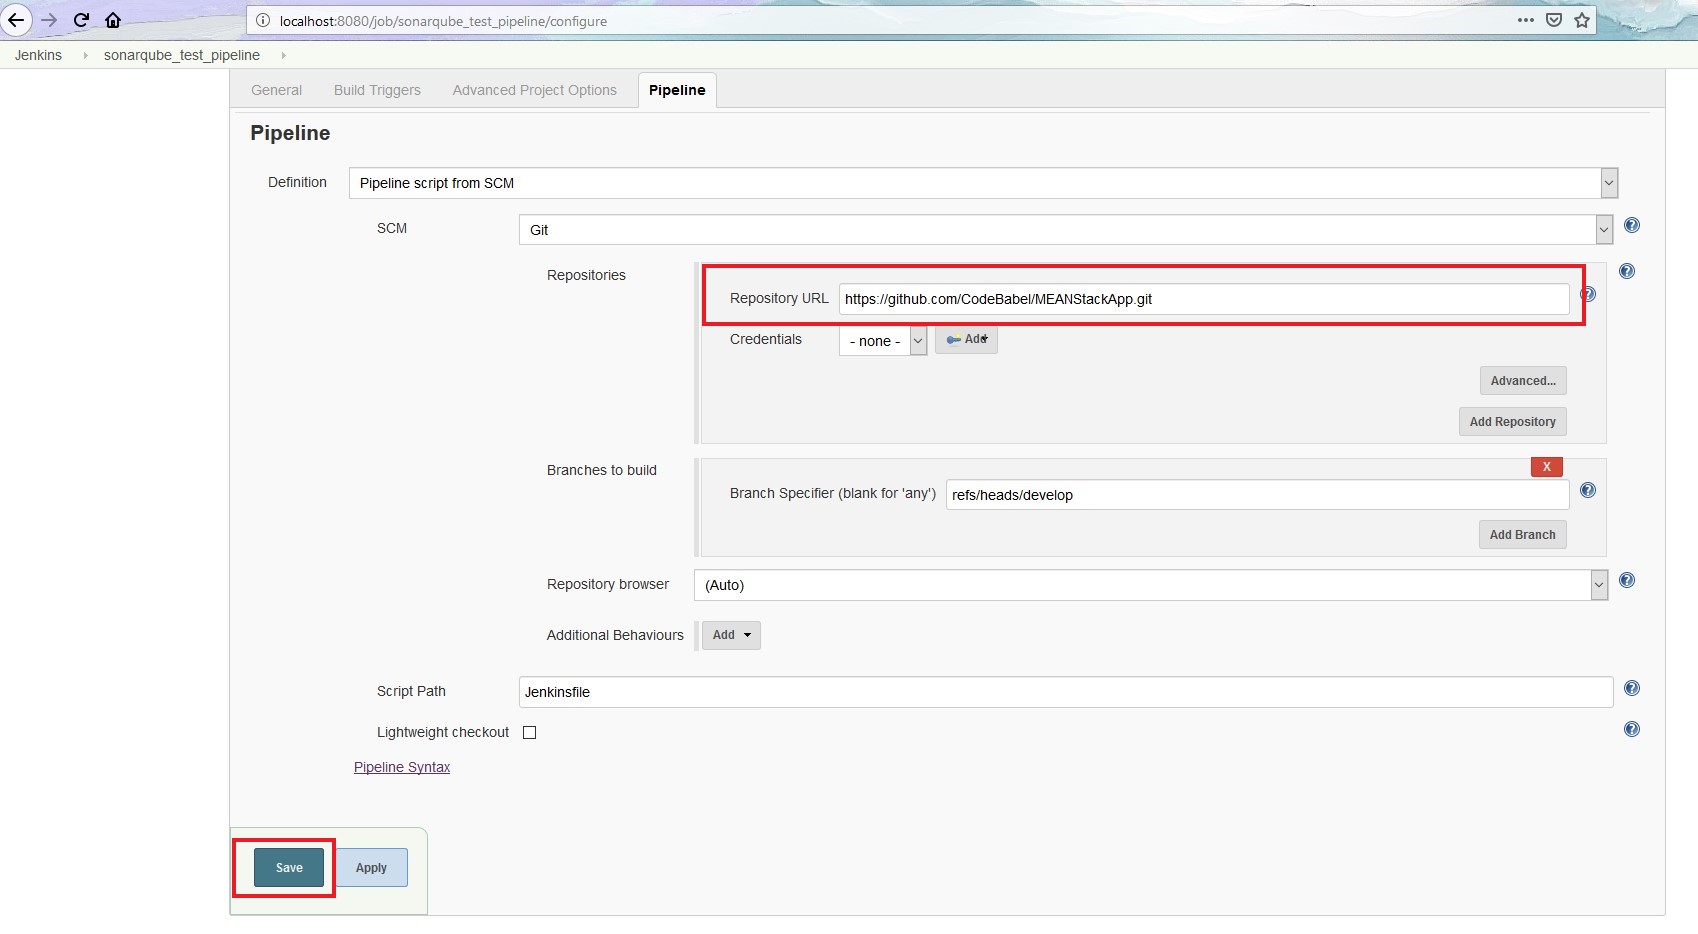
As shown in the image, the source code is under “develop” branch of the repository “MEANStackApp”. We have also committed a Jenkinsfile there which will be the input for our pipeline job.
The Jenkinsfile has the logic to checkout the source code and for SonarQube tool to perform code analysis on the code. Below is the content of this Jenkinsfile.
node('docker') {
  stage('SCM') {
    checkout poll: false, scm: [$class: 'GitSCM', branches: [[name: 'refs/heads/develop']], doGenerateSubmoduleConfigurations: false, extensions: [], submoduleCfg: [], userRemoteConfigs: [[url: 'https://github.com/CodeBabel/MEANStackApp.git']]]
  }
  stage('SonarQube Analysis') {
        sh "/home/jenkins/tools/hudson.plugins.sonar.SonarRunnerInstallation/sonarqubescanner/bin/sonar-scanner -Dsonar.host.url=http://192.168.0.14:9000 -Dsonar.projectName=meanstackapp -Dsonar.projectVersion=1.0 -Dsonar.projectKey=meanstack:app -Dsonar.sources=. -Dsonar.projectBaseDir=/home/jenkins/workspace/sonarqube_test_pipeline"
    }
  }
Building the Jenkins Pipeline Job
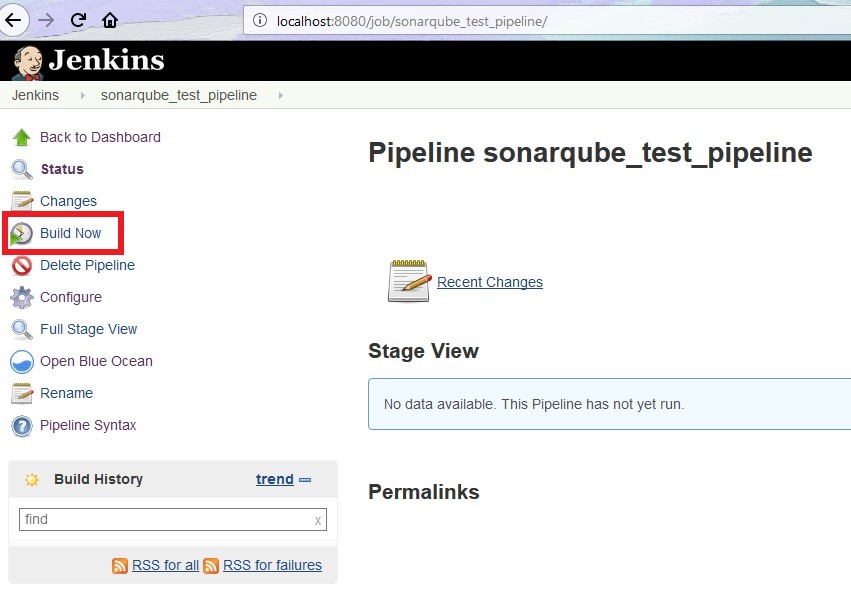
Since we have configured everything, let’s build the job and see what happens. For that, click on the “Build Now” option in the job.
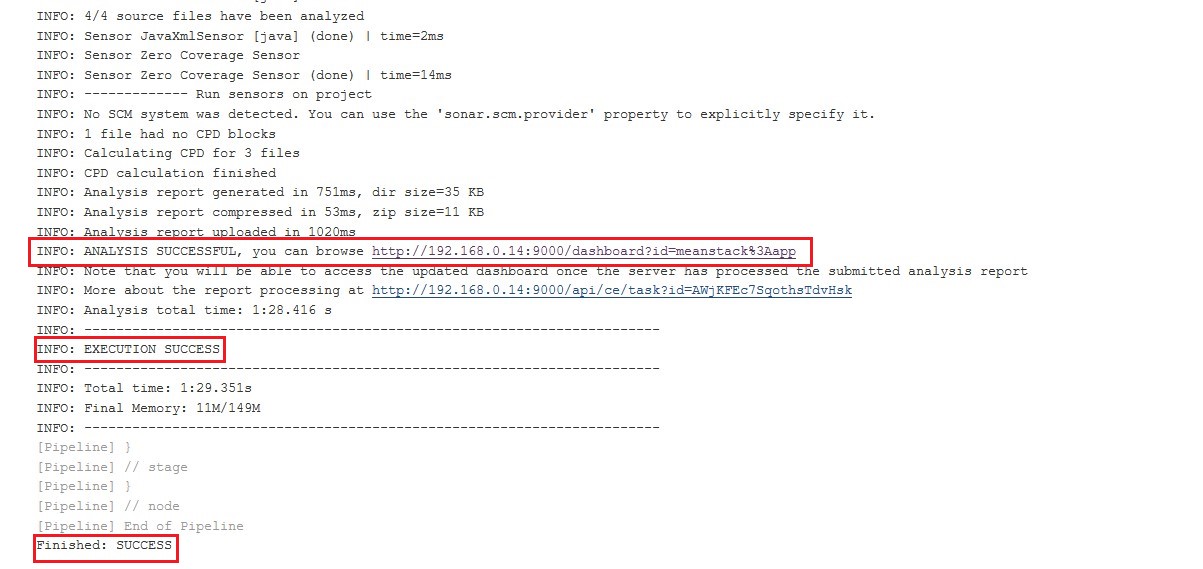
From the logs below, it can be seen that the Jenkins job is successful.
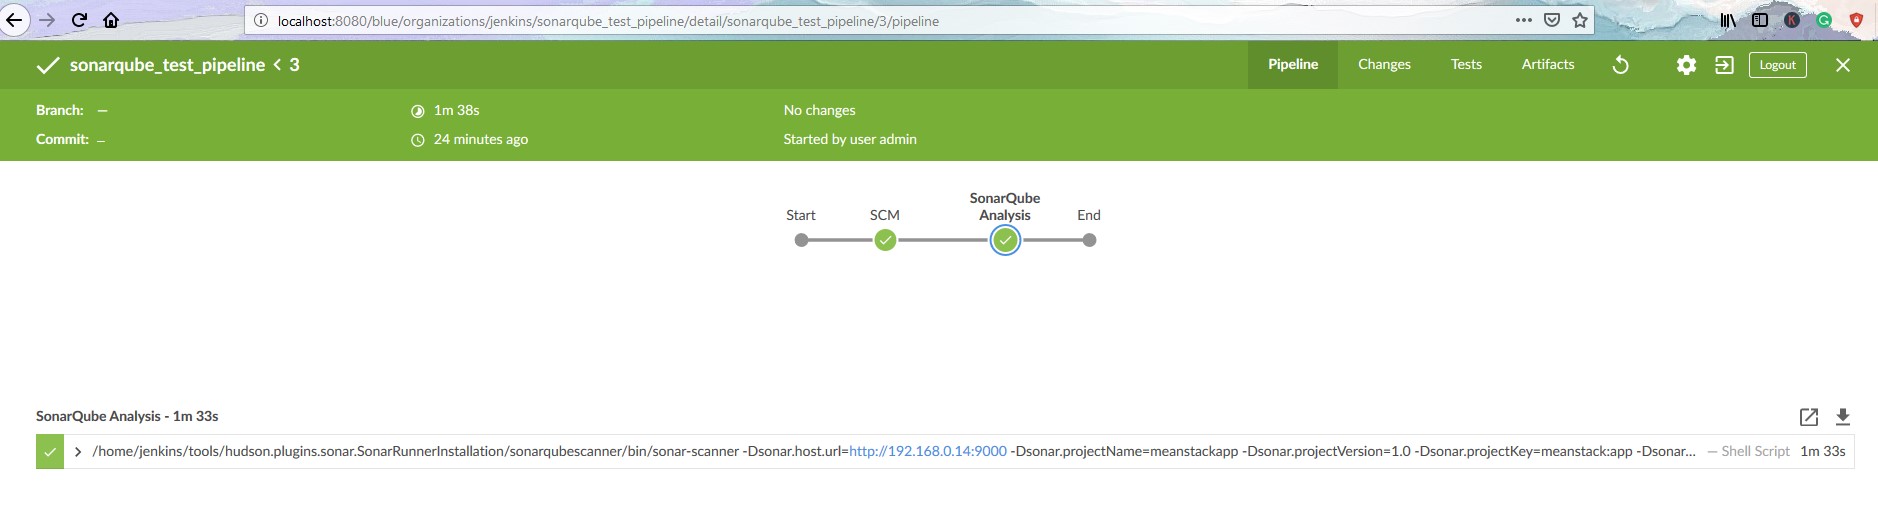
Below is the job view in Blue Ocean. Pretty, isn’t it?
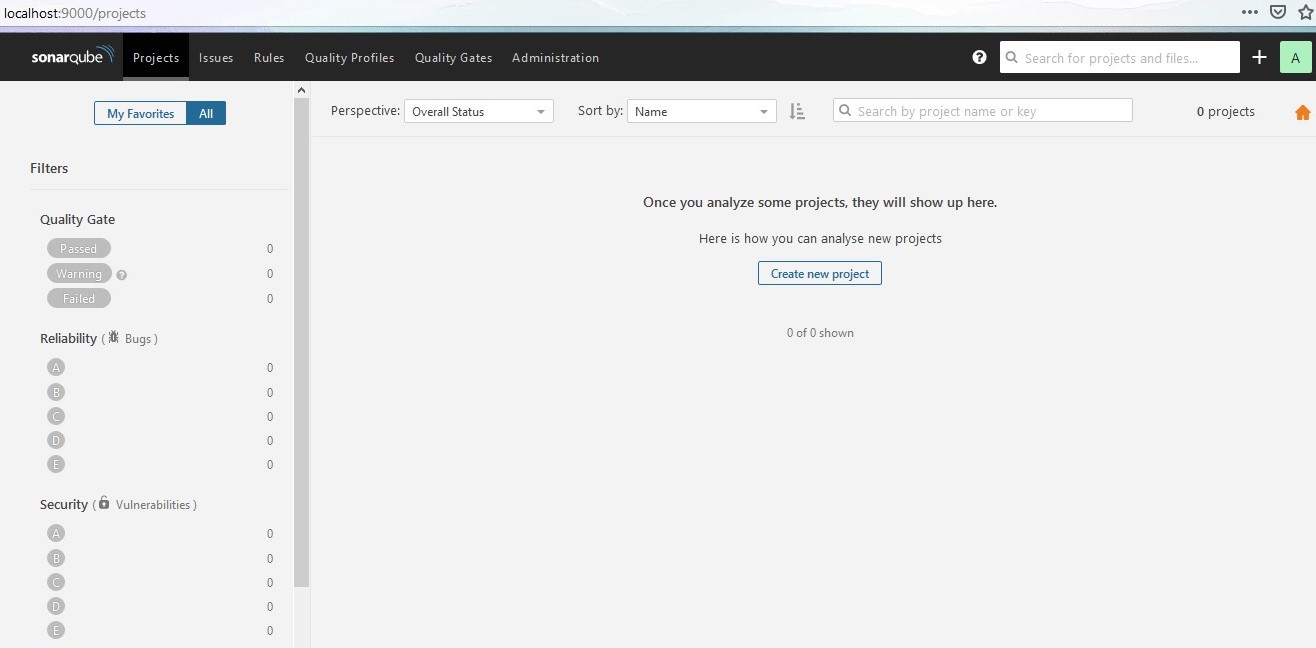
To check the analysis report, let’s go to the link as shown in the build logs. The link basically points to the SonarQube server URL.
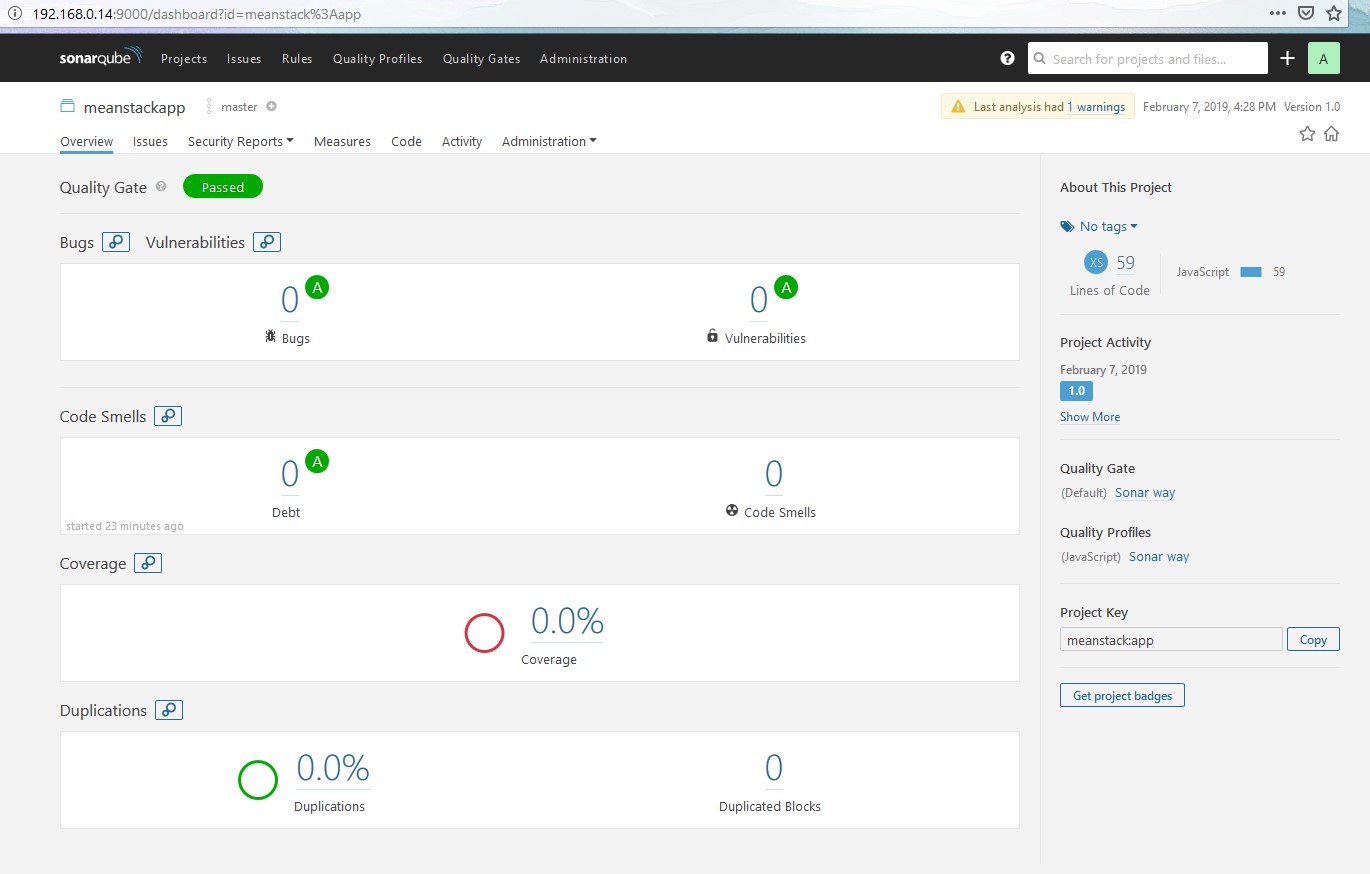
Here, it says there are no bugs and vulnerabilities in this code and the Quality Gate status looks “Passed“. Though it’s a simple app, it is good to know that code quality is good 🙂
Conclusion
We have reached the end of this article. Here, we have learned how to integrate SonarQube with Jenkins for a simple node.js app in order to perform code analysis. The same procedure can be followed for applications written in any other programming language. Here are the few example pipeline code for different technologies. The codebase used in this article is available here!
Also, have a look at our other #backtobasics article which talks about GIT branching and Merging with Jenkins Multibranch Pipeline. Please subscribe to our blog to stay up to date on any new articles and share your feedback below!