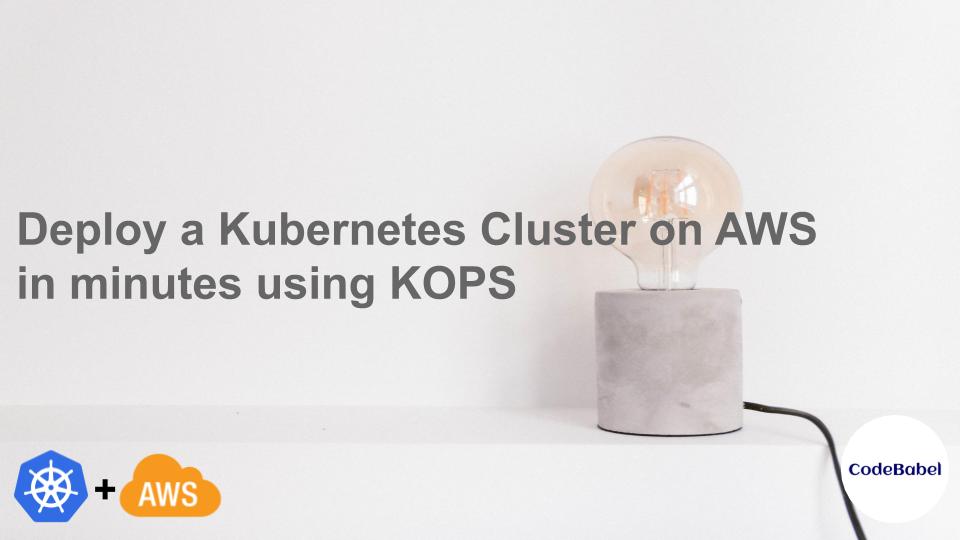
Deploy a Kubernetes Cluster on AWS in minutes using KOPS
This is the very first article of our Kubernetes Series. Kubernetes does make the life of an Application developer easy by automating the deployment, scaling and management of containerized applications. However, the price to pay here is the complexity of installation and maintenance of the cluster itself. KOPS which is an acronym for Kubernetes Operations is a very good attempt at simplifying some of that complex installation and maintenance process. We will looking at KOPS which is the official project to deploy kubernetes on various cloud providers like AWS.
KOPS claims to be “The easiest way to get a production grade Kubernetes cluster up and running.” We will be testing it out in this article. ⚠️Spoiler alert⚠️, its indeed an awesome and probably the easiest way to deploy kubernetes out there!(The heading of the article is probably a give away too 😜)
Here is an outline of what we will be learning in this article:
- What is KOPS?
- Installing KOPS
- Deploying a Kubernetes Cluster within the free tier on AWS
- Deploying the kubernetes dashboard on the cluster
- Conclusion
What is KOPS?
KOPS or Kubernetes Operations is an open-source project for installing and the maintenance of Kubernetes clusters, At this time when the article is being written it supports AWS, Openstack and GCE cloud providers and its developed using GO. The KOPS website claims that “its like kubectl for Kubernetes clusters!”
Installing KOPS
Here is a high-level roadmap of how we are going about the installation of this cluster.
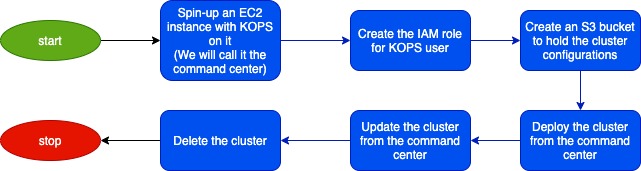
Let’s spin up our command center with KOPS installed on it. We will be using the free tier on AWS account as much as possible to avoid incurring any cost.
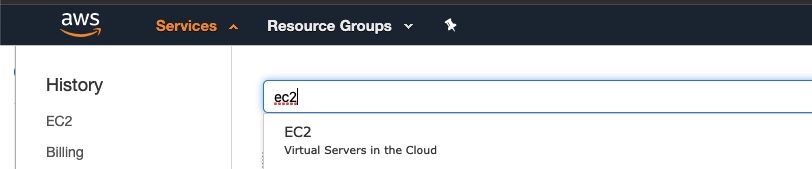
- Lets start by spinning up a linux instance under the t2.micro instance type

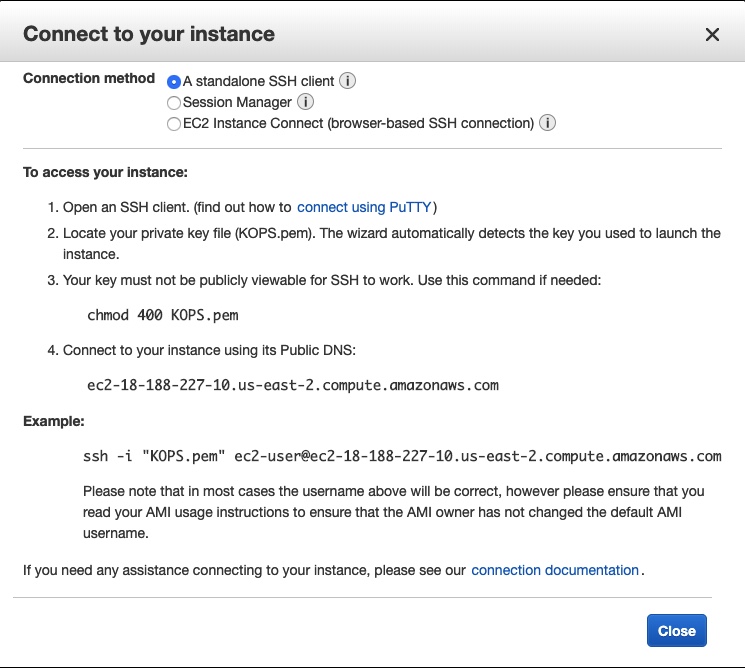
- Now connect to the instance using the private key
Install kubectl and KOPS cli
- Lets install kubectl, this is the pre-requisite for KOPS
curl -LO https://storage.googleapis.com/kubernetes-release/release/`curl -s https://storage.googleapis.com/kubernetes-release/release/stable.txt`/bin/linux/amd64/kubectl
chmod +x ./kubectl
sudo mv ./kubectl /usr/local/bin/kubectl
- Now install KOPS itself
curl -LO https://github.com/kubernetes/kops/releases/download/$(curl -s https://api.github.com/repos/kubernetes/kops/releases/latest | grep tag_name | cut -d '"' -f 4)/kops-linux-amd64
chmod +x kops-linux-amd64
sudo mv kops-linux-amd64 /usr/local/bin/kops
- Lets validate if both kubectl and KOPS are installed successfully!

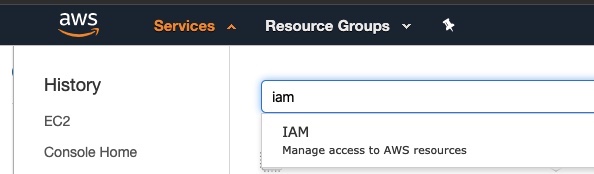
Create an IAM role for the KOPS user
Lets create an IAM role for the “kops” user which will be used to spin up the AWS resources needed for the kubernetes cluster
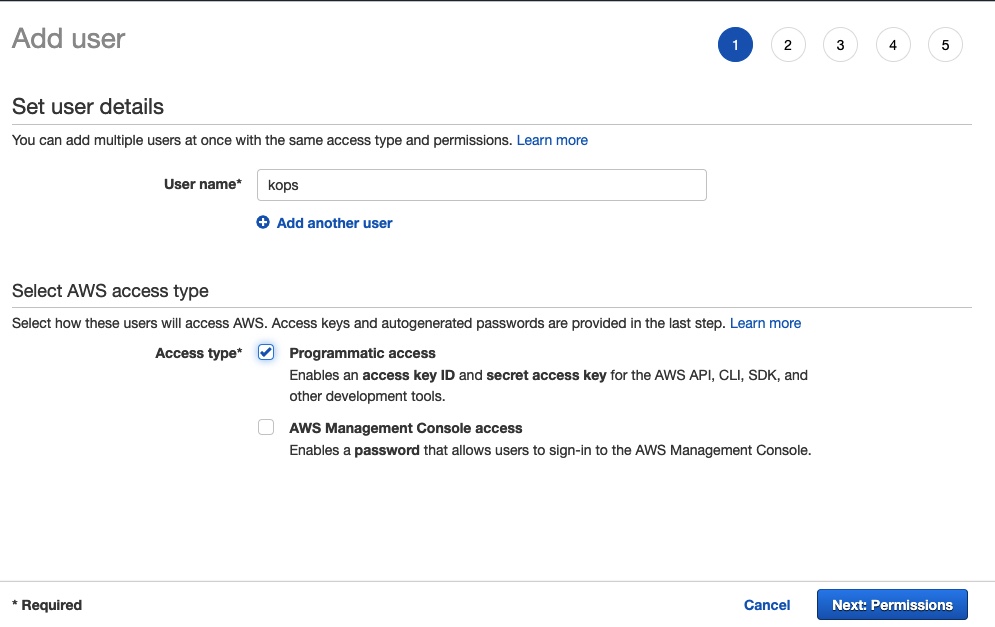
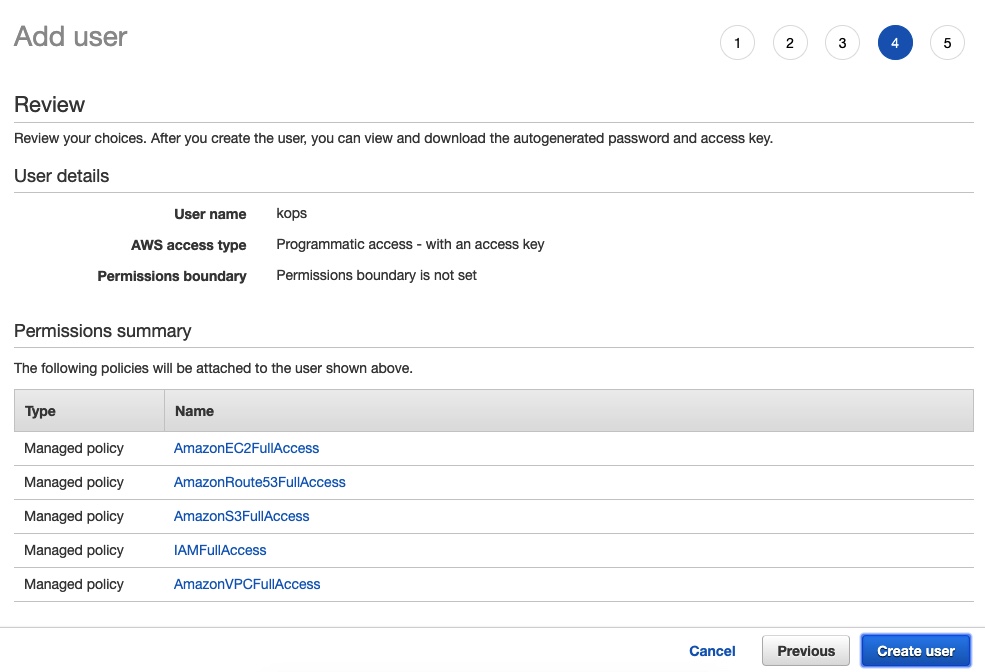
- We have to start by creating a user named “kops” from the AWS console. Please refer the following screenshots for step-by-step configuration
Enable Programmatic access as the user would be making API calls only
Attach the following policies to the user
AmazonEC2FullAccess
AmazonRoute53FullAccess
AmazonS3FullAccess
IAMFullAccess
AmazonVPCFullAccess
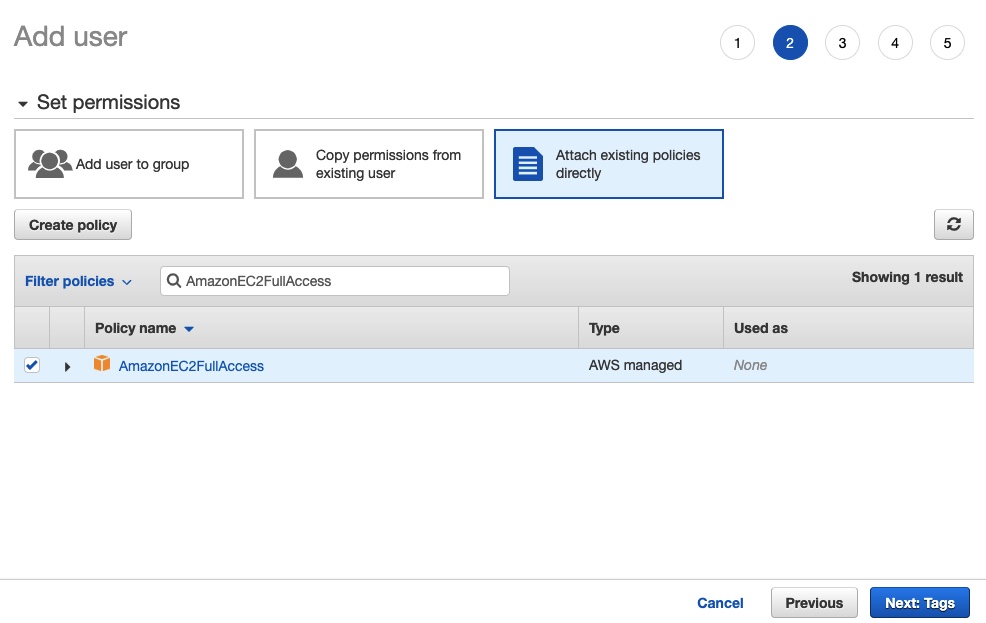
Create the user
The next screen will show the Access ID and the Secret Key. (🛑 DON’T SHARE THESE 🛑)

Let’s configure the AWS cli with the kops user Access Key ID and Secret Access Key to make the future API calls from AWS cli. Refer the snapshot below for the steps.
Note: AWS Cli is pre-installed on the EC2 instance, so we can start using it right away!

We also have to export the following Environment Variables for KOPS to read them so that it can make the API calls. Run the following commands in the prompt.
export AWS_ACCESS_KEY_ID=$(aws configure get aws_access_key_id)
export AWS_SECRET_ACCESS_KEY=$(aws configure get aws_secret_access_key)

Create an S3 bucket as the state store for the cluster
Now we are ready to create a S3 bucket which will host all the configurations of the cluster. This will be used by KOPS to get the current cluster resource details during updates, upgrades, backups etc.
Now that we have the aws cli configured, creating the S3 bucket is just a single command away! Let’s run the following command to create one(Note: The bucket name needs to be unique globally)
aws s3api create-bucket \
    --bucket codebabel-kops-article-demo \
    --region us-east-1

Deploying a Kubernetes Cluster within the free tier on AWS
It’s finally the time to spin up the cluster. As part of this article, we will be only using the free tier to spin up the cluster. This is no way how it will be done in Production, when deploying for production a better capacity planning needs to done based on the expected load on the cluster.
Having said that, this example will be good when working on local development environment and you need a “Production-like” cluster to deploy and test your apps. This also is a testimony of how easy it is to configure KOPS to deploy the the Kubernetes Cluster that you need on AWS.
Let’s start by defining the name of our cluster and point to the state store S3 bucket we created in the previous step.
export NAME=codebabel.k8s.local
export KOPS_STATE_STORE=s3://codebabel-kops-article-demo
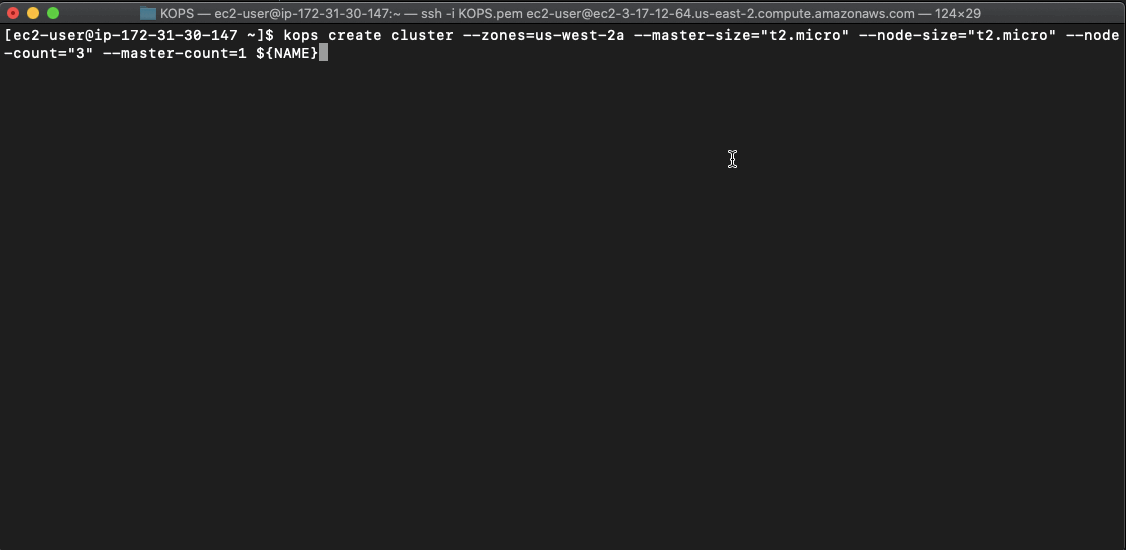
We will be running the kops create cluster command with the following arguments,
kops create cluster --zones=us-west-2a --master-size="t2.micro" --node-size="t2.micro" --node-count="3" --master-count=1 ${NAME}
The --master-size, --node-size are the arguments that is used to define the instance type so that it falls under the free tier.
The output of this would a Kubernetes cluster with 1 master node and 3 worker nodes. Below is the create cluster command output.
Note: The create cluster initially only performs a dry run and outputs the different resources it’s about to spin up, this is more like a terraform plan. And you have to run the kops create cluster with a --yes flag in-order to apply your changes more like terraform apply.
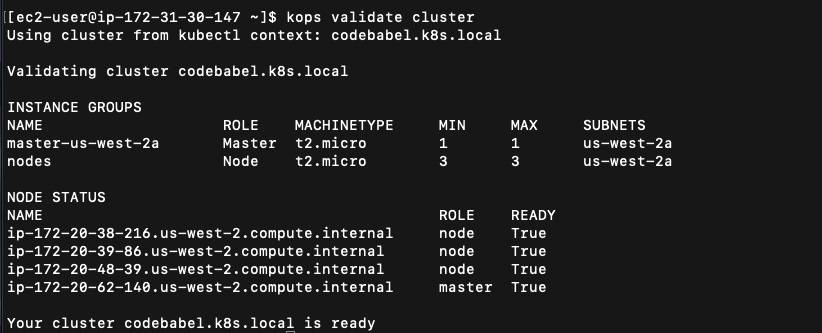
Let’s validate our cluster by running the following validate command.
kops validate cluster
Below is our output,
Now, we are ready to run kubectl command to interact with our cluster. Here is an example below where we list the kubernetes nodes using the kubectl command

Let’s deploy our very first resource on this new cluster which just took us few mins to spin up!
Deploying the kubernetes dashboard on the cluster
We will be deploying the kubernetes dashboard using the following command.
Let’s use the following command to deploy the kubernetes dashboard,
kubectl apply -f https://raw.githubusercontent.com/kubernetes/dashboard/v2.0.0-beta8/aio/deploy/recommended.yaml
Let’s run the following command to access the Kube Dashboard,
kubectl proxy --address 0.0.0.0 --accept-hosts '.*'

Let’s try to access our dashboard which is now running on our command center on port 8001. We can do this by accessing the public DNS of our EC2 instance and appending the port 8001 to it as described here.
And voila! that’s our dashboard! Which is also the very first application we deployed on our kubernetes cluster.

This is where we will stop this article and we will continue with accessing the dashboard in the next article in the series.
Conclusion
We have come to the end of this article. This article demonstrate how KOPS simplifies the deployment and maintenance of a kubernetes cluster. We recommend you to go ahead and get your hands dirty and deploy your own Kubernetes cluster on AWS. As we had mentioned previously, the example in this article uses the AWS Free Tier only for spinning up our cluster. This is just to show off the capabilities of KOPS and this is not a way to deploy clusters on Production, a better capacity planning has to go in before deciding on the number of master and worker nodes and how much resources you must put into each instance to handle the expected load.
This is however a very good example to deploy a “Production Like” kubernetes cluster on AWS to perform integration tests. We really hope you enjoyed this article and we encourage you to read other articles on our blog.
Please share your thoughts, questions, and suggestions in the comment section below. Do subscribe to our blog to stay up to date on any new articles.